Introduction
Darkshore is a questing zone for Night Elves and Worgen after they complete their starting zone quests around level 10-12. They’ll be able to get the quest Breaking Waves of Change in Darnassus.
However other Alliance races can also quest here. From Stormwind, take the ship on the southern-most dock. From Ironforge, take the Deeprun Tram to Stormwind first. From the Exodar, take the ship from the dock just to the south of the city. In any case, you’ll end up in Rut’theran Village. Up by the flight path is a glowing red portal that will take you up to Darnassus where you can get the lead-in quest, Hero’s Call: Darkshore!. (If you’re too high level you won’t be able to get the quest, but don’t worry as it’s not strictly necessary.)
From Darnassus, take the glowing red portal down to Rut’theran Village (don’t take the flight path, it’s much slower). Then take the flight path to Lor’danel in Darkshore.
At some stage during this zone, you’ll hit level 20 and qualify for the first level of the Riding skill. To speed up leveling, it’s essential you get a mount as soon as possible, even if you have to go out of your way to get it. Worgen don’t need to worry as they get the Running Wild ability for free at level 20. Paladins and Warlocks get their Riding skill and mount spell from their class trainer. All others will need to travel to their starting zones or home city to train Riding and buy a mount:
- Night Elves at the Cenarion Enclave in Darnassus
- Humans at Eastvale Logging Camp (Elwynn Forest)
- Dwarves at Amberstill Ranch (Dun Morogh)
- Gnomes at Steelgrill’s Depot (Dun Morogh)
- Draenei at the Exodar front entrance
So as soon as you’re next by a flight path after hitting level 20, travel to Rut’theran Village and on to your riding trainer and mount vendor. Use your hearthstone to return to Darkshore and continue questing.
Color Code
- Quests
- Items
- Locations
- Enemies to kill
- NPCs
- Co-ordinates
Lor’danel
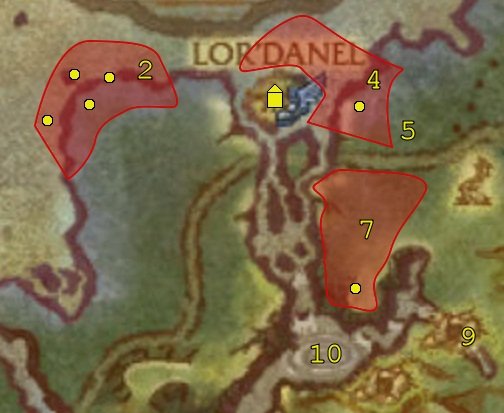
1. Turn in Breaking Waves of Change/Hero’s Call: Darkshore! and get the follow-up, The Last Wave of Survivors.
 Go to the inn, speak to the innkeeper and set your hearthstone to Lor’danel.
Your class trainer should be found in or near the inn for when you need to learn new abilites. Whenever you’re in Lor’danel and you have new abilities you need to learn, you should visit your trainer. However there are no class trainers in Darkshore for Paladins and Shaman. Paladins can go to Darnassus for a trainer. The closest trainer for Shaman is in the Exodar (take the ship from the western dock in Rut’theran Village to get to the Exodar; get the Exodar flight path so that in future you can fly straight there).
Also get the quest Threat from the Water.
2. Now take that west bridge out of town and go onto the beach. As you follow the beach away from town, kill 8 Vile Sprays and talk to the dying NPCs listed below.
- Volcor: on the shoreline at 45,18
- Gershala Nightwhisper: on a rock just off the coast at 44,17
- Cerellean Whiteclaw: just inland from the beach at 44,19
- Shaldyn: on a rock just off the coast at 42,21
If you haven’t killed enough Vile Sprays by the time you’ve talked to all 4 NPCs, start heading back and look for the remaining Vile Sprays that you need in the sea itself. If you have to go underwater to kill them, make sure to watch your breath meter and return to the surface before your breath runs out.
3. Return to Lor’danel (50,19) and turn in:
- Threat from the Water
- The Last Wave of Survivors
Get the following quests:
- The Boon of the Seas
- Buzzbox 413
4. Jump into the sea north-east of town (near the flight path) and dive down underwater. Again, make sure to watch your breath meter and return to the surface before your breath runs out. Kill Corrupted Tide Crawlers for their flesh and open Encrusted Clam Muscles until you have acquired 16 Encrusted Clam Muscles. Then return to the beach east of town and kill the remaining Corrupted Tide Crawlers that you need.
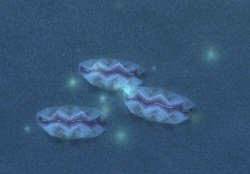
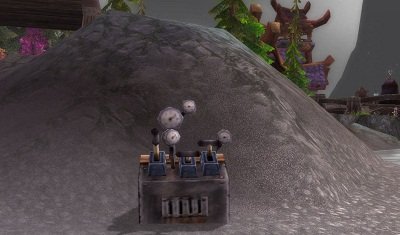
When you have the 4 Corrupted Tide Crawler Flesh that you need, go to the buzzbox at 53,19 to turn in Buzzbox 413 and get the follow-up, No Accounting for Taste.
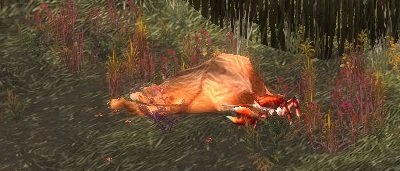
5. Go to the dead bear at 55,21, just inland from the beach, and loot it.
6. Return to Lor’danel (51,19), turn in No Accounting for Taste and get the follow-up, Buzzbox 723.
7. Head south-east of Lor’danel and kill Corrupted Thistle Bears for the guts that you need. However, don’t bother killing the green, sickened bears as they won’t give you XP or be lootable when you kill them. Generally keep on heading southwards as the quest turn-in is at the southern point of the bear’s area.
When you have the 6 Corrupted Thistle Bear Guts that you need, go to the buzzbox at 54,29 and turn in Buzzbox 723 and get the follow-up, A Cure in the Dark.
8. Return to Lor’danel (via the bridge at 52,22) and get the quest, The Corruption’s Source.
9. Go round the river at 56,27 and along the path on the far side of the river. The path will end at a waterfall, Cliffspring Hollow (56,31) – go through the waterfall to enter a cave.
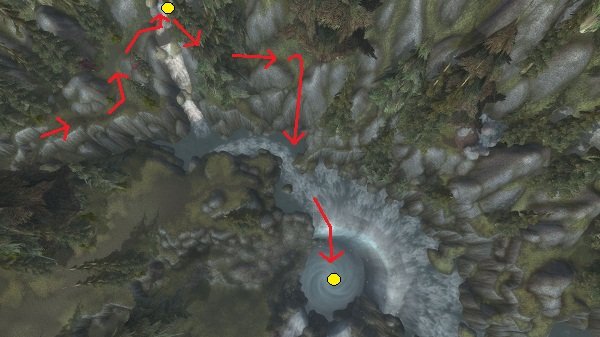
There are a few things we need to do throughout the cave:
- Kill a Vile Corruptor and loot a Corruptor’s Master Key from it. Use the key to get the quest Bearer of Good Fortune. From then on, right-click the cages within the cave to free uncorrupted animals until you have freed 8 animals.
- Kill 8 Vile Grells.
- Loot 6 Foul Ichor.
While doing the above, follow the path to the left down to a central cavern. Take the left (western) tunnel to get to an area with a workbench. After clearing the nearby mobs, get the quest from the workbench, A Troubling Prescription.
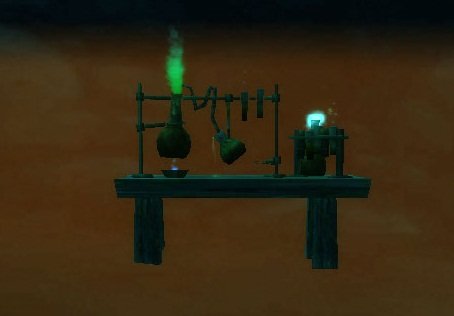
Return back to the central cavern and take the other (eastern) tunnel. At the end of the tunnel is Zenn Foulhoof. Kill him.
Head back to the cave entrance, making sure to complete the objectives in the list above.
10. Leave the cave, and jump down to the left of the waterfall. Follow the top of the cliffside and you’ll see the top of a massive waterfall ahead of you. Jump into the water and swim over the edge of the waterfall. Go into the big whirlpool, Maw of the Void, at 52,31. You will be sucked down into Bashal’Aran’s Collapse.
Follow the only path out up to Telarius Voidstrider. Kill him and loot him for Writings of the Dark Herald. Use it to get the quest Writings of the Void.
11. Use your hearthstone to return to Lor’danel. (If your hearthstone is on cooldown, return to Bielara Ivyshroud at the foot of the path and talk to her to return to the surface, then walk back to Lor’danel.)
Turn in:
- The Boon of the Seas
- Writings of the Void
- A Cure in the Dark
- The Corruption’s Source
- Bearer of Good Fortune
- A Troubling Prescription
Get the following quests:
- The Final Flame of Bashal’Aran
- A Love Eternal
- A Lost Companion
Bashal’Aran
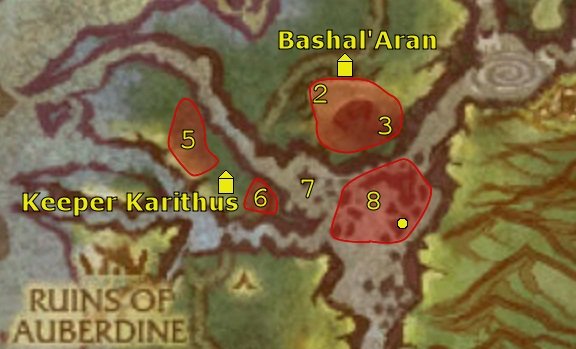
1. Take the southern bridge out of town. To either side of you, you’ll see a night elf mounted on a nightsaber. Talk to the night elf to your right (west) and ask to travel to Bashal’Aran. This will give you a ride on a nightsaber to Bashal’Aran.
Get the quest, Solace for the Highborne. While doing the next couple of quests in Bashal’Aran, kill Cursed Highborne and Writhing Highborne ghosts.
2. Go up to the ruins to the south. Right-click the Final Flame of Bashal’Aran at 45,34 to light the flame. Be ready for two Highborne ghosts that will spawn and attack you.
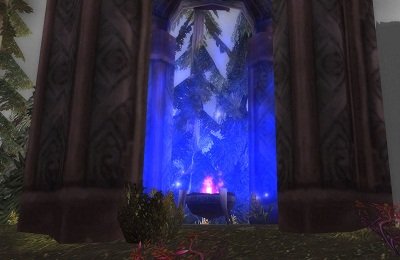
3. Then go to 48,36, kill Anaya Dawnrunner and loot Anaya’s Pendant.
Continue to kill Highborne in the area until you’ve completed Solace for the Highborne. Then return to 46,33 and turn in Solace for the Highborne.
4. Head south-west along the road. Just after the break in the road, at 42,39, turn in A Lost Companion.
Get the following quests:
- Unsavoury Remedies
- Ritual Materials
- Twice Removed
5. In the area to the west, look for sleeping Moonstalkers (passive with yellow nameplates), such as a group at 41,38. Loot Moonstalkers to get their whiskers. Watch out as they will sometimes aggro as a result. Repeat until you have 3 Moonstalker Whiskers.
6. Head east across the road, looking for deer. Loot the Mottled Does for their hair until you have 3 Tufts of Mottled Doe Hair.
7. Head further north-east, where there are a number of bears on the banks of the river. They start off as aggressive (red nameplate). Wait until one catches a fish and turns passive (yellow nameplate). This can take a while – watch over multiple bears to increase your chances. Rush over and loot the now passive bear for his fur. Like the moonstalkers, the bears will often aggro as a result. Repeat until you have 3 Thistle Bear Furs.

8. Continuing south-east, there are two things we need to do while in the area.
- Collect Fuming Toadstools on the ground.
 Kill Darkscale Scouts. Each time you kill one of the naga, use your Petrified Root on its body to spawn a Withered Ent.
Head to 48,40 and kill Lady Janira – watch for her heals and interrupt them if you can. (You can also use your Petrified Root on her dead body for another Withered Ent.)
Continue to collect Fuming Toadstools and spawn Withering Ents until you have completed Unsavory Remedies and Twice Removed.
9. Return to Keeper Karithus (42,39, the path up from the water by the torch at 46,40 is the quickest way).
Turn in the following quests:
- Unsavoury Remedies
- Ritual Materials
- Twice Removed
Get the quest The Ritual Bond.
10. Right-click the Grovekeeper’s Incense at Keeper Karithus’s feet. This will take you into a spirit realm version of the area.
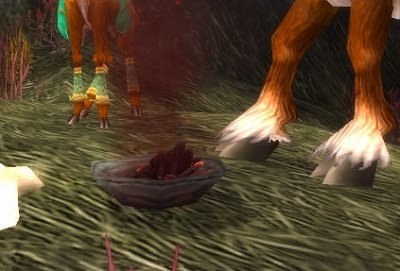
You should see three quests available on your mini-map. Go to the Great Stag Sprit around 43,40 and get and complete his quest, Spirit of the Stag (ignoring the other two quest givers).
11. Return to Keeper Karithus (42,39) and turn in The Ritual Bond. After a short interlude you’ll be able to get the follow-up, Grimclaw’s Return.
12. Use your heathstone to return to Lor’danel. (If your hearthstone is on cooldown, return to Bashal’Aran at 46,33 and take the nightsaber back to Lor’danel.)
Turn in
- Grimclaw’s Return
- A Love Eternal
- The Final Flame of Bashal’Aran – get the quest The Shatterspear Invaders
Also get the quest An Ocean Not So Deep
Ruins of Mathystra
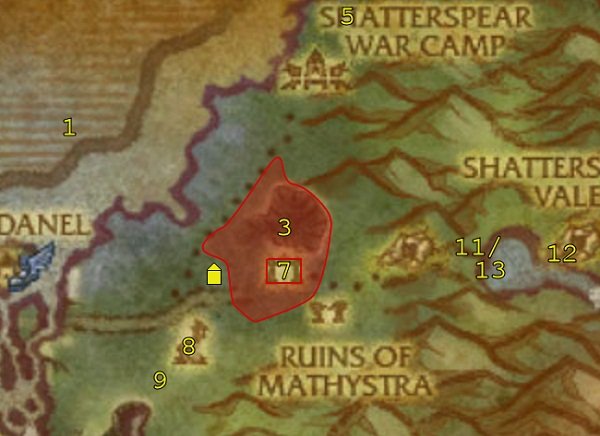
1. Swim north to 53,11 where you’ll find a rock out in the middle of the sea near the masts of 2 sunken ships.
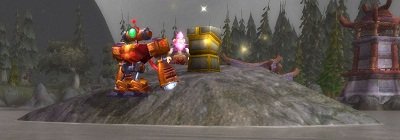
Right-click the Decoy Bot Control Console to take control of the decoy bot, Foolhardy Adventurer. This may well be your first vehicle quest – your action bar will be replaced with an action bar for the vehicle; in this case, the decoy bot you’re controlling. This one’s very simple. You only have 1 ability to use:
 Depth Charge Countdown Pulse – use it when you’re near a group of murlocs to kill them. You’ll lose the decoy bot in the process but you can take control of another one until you’ve finished the quest.
Now go forth and kill 50 murlocs.
2. Swim south-east to shore (avoiding the murlocs if you can) and head on to the Ruins of Mathystra at 58,19. Turn in The Shatterspear Invaders. Get the following quests:
- Shatterspear Laborers
- Remnants of the Highborne
3. In the area north and east of here, kill Shatterspear Laborers and collect Higborne Relics until you have completed both quests. Also look out for a Shatterspear Overseer; there a few patrolling the area. Kill one and loot the Overseer’s Orders from it – use it to get the quest Reason To Worry.
4. Return to the Ruins of Mathystra quest givers at 58,19 and turn in:
- Remnants of the Highborne
- Reason to Worry – get the follow-up, Swift Response
- Shatterspear Laborers
Get the other quests:
- Denying Manpower
- War Supplies
5. While heading for the captives and doing the follow-up quests, there are two other things we need to do:
- Kill Horde Enforcers and Shatterspear Mystics to complete Denying Manpower.
 Use the Sentinel Torch while nearby Shatterspear Armaments to burn them to complete War Supplies.

Head for the dying night elf at 63,6, Alanndarian Nightsong. Turn in Swift Response and get the follow-up, One Bitter Wish.
Rit’ko is just to the north. Kill him and loot his key. In the north-eastern most cage is Sentinel Aynasha. With the Shatterspear Torturer’s Cage Key, you should be able to right-click the cage to unlock it and free her.
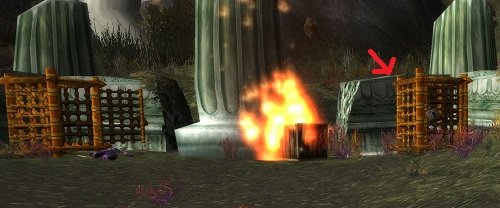
We’re now going to start an escort quest to accompany her to safety. This might be your first escort quest, in which case be mindful of the escort’s golden rule: hang back and let the NPC always get aggro first. The NPCs are normally quite tough and have a nasty habit of sometimes ignoring fights you get involved in and running on ahead (though their behaviour has improved over the years). Note that she might not be there when you get there as someone else might be doing her escort – just kill some nearby mobs while you wait for her to respawn.
Get Sentinel Aynasha‘s quest, Timely Arrival, and escort her to the nearby dock. If you fail the quest for any reason, abandon it in your quest log, free her again and re-take the quest.
With the escort complete, finish up Denying Manpower and War Supplies.
6. Return to the Ruins of Mathystra (58,19) and turn in:
- War Supplies
- One Bitter Wish
- Timely Arrival
- Denying Manpower
Get the following quests:
- Strategic Strikes
- On the Brink
- The Looting of Althalaxx
During the next few quests, kill any Shatterspear Shaman you see for their Shatterspear Amulets until you have 6 of them.
7. Go east to the ruin at 60,20 and go all the way down the stairs.

 Suspended above the water at the bottom of the stairs is Sheya Stormweaver. Kill her. (You can use the Dryad Spear on her as a ranged attack which will make the fight easier – particularly important for melee classes who won’t be able to close to melee range at the start of the combat.)
8. Climb back up the stairs and go to the tower of Althalaxx at 58,24.
Be careful of extra adds on the staircase here. Up the stairs you’ll find Teegan Holloway. Kill him.
Also on the first landing of the stairs, up against the wall, is the book you need, Narassin’s Tome. Loot it.
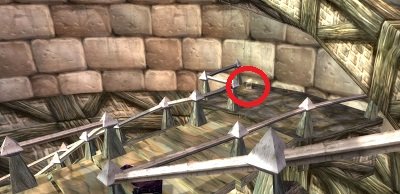
9.  Leave the tower and go to 56,25 where you’ll find Lorenth Thundercall. Kill him. (Again, you can use the Dryad Spear on him to make the fight easier and for melee classes to attack from range.)
If you need any more Shatterspear Amulets for On the Brink kill the necessary Shatterspear Shaman.
10. Return to the Ruins of Mathystra (58,19) and turn in:
- The Looting of Althalaxx
- On the Brink
- Strategic Strikes
Get the quest, The Front Line.
11. Speak to the Nighsaber Rider to take a nightsaber to Shatterspear Vale (not Lor’danel). You will dismount right next to a quest-giver. Take his quest, The Ancients’ Ire.
This is another vehicle quest. Right-click the Vengeful Protector to mount it. Your action bar will be replaced with an action bar for the vehicle you’re on; Vengeful Protector you’re riding. You will have 2 abilities to use:
 Shockwave – use to kill trolls when they surround you
 Moonsurge – use to burn down a building when you’re near one
Now head across the water, killing trolls and burning down troll buildings.
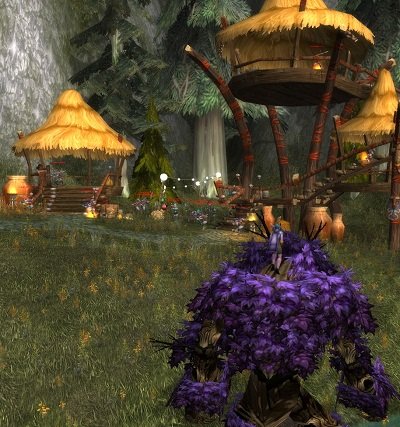
12. When you’ve killed the 30 trolls and burned down the 6 buildings that you need for The Ancients’ Ire, head up the path to the cave entrance at 72,19 where Sandrya Moonfall is waiting. Use the Leave Vehicle icon to dismount from the Vengeful Protector.
Turn in The Front Line and get the follow-up, Ending the Threat.
For the upcoming fight, wait for Sandrya Moonfall to tell you Jor’kil the Soulripper‘s shield is down before you start attacking him. Now talk to Sandrya Moonfall to begin the assault. When you’ve killed Jor’kil, loot him to get Hellscream’s Missive and use it to get the quest Disturbing Connections.
Turn in Ending the Threat.
13. Head back down west and across the water to Kerlonian Evershade (69,19) to turn in The Ancients’ Ire.
14. Use your hearthstone to return to Lor’danel. (If your hearthstone is on cooldown, take the nightsaber back to Lor’danel.)
Turn in:
- An Ocean Not So Deep
- Disturbing Connections
Get the following quests:
- Remembrance of Auberdine (completed immediately)
- The Twilight’s Hammer
- Twilight Plans
Ruins of Auberdine
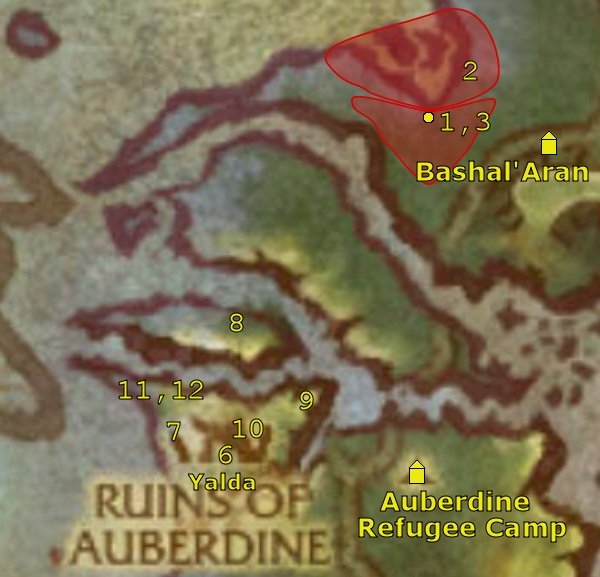
1. Take the nightsaber to Bashal’Aran (southern bridge out of town and to your right). Head west to the Twilight Cultist encampment (45,31).
While killing Twilight Fanatics and collecting Twilight Plans, head for 44,30 and get the quest Power Over the Tides from the sacrificed Moon Priestess Tharill.
2.  Immediately go onto the beach and kill Tidal Spirits and use the Orb of Elune on their corpses until you’ve soothed the 6 sprits you need to complete Power Over the Tides.
3. Return to Moon Priestess Tharill at 44,30 and turn in Power Over the Tides.
Continue killing the Twilight Fanatics and collecting the Twilight Plans you need. You’ll also need to kill High Cultist Azerynn at 43,31.
4. When you’re done with both quests, The Twilight Hammer and Twilight Plans, return to Bashal’Aran (46,33) and take the nightsaber back to Lor’danel.
Turn in:
- The Twilight’s Hammer
- Twilight Plans
Get the quest In Aid of the Refugees.
5. Once again take the nightsaber to Bashal’Aran, then head south-west and south along the road (and across rivers) to the Auberdine Refugee Camp (42,45).
Turn in In Aid of the Refugees. Get the quests:
- Against the Wind
- Three Hammers to Break
- Malfurion’s Return
While doing the next few quests, make sure to kill the Fenzied Cyclones for their Frenzied Cyclone Bracers. You will need 8 of them.
6. Head into the Ruins of Auberdine to the north-west, to Yalda at 38,43. Get her quest, Coaxing the Spirits.
Just to the west is the broken Hippogryph platform where you’ll find the corpse of Caylais Moonfeather. Talk to it to coax his spirit. You should then get his spirit (looks like a wisp) following you.
7. Go on to the beach where you’ll find Windmaster Tzu-Tzu at 37,42. Kill him.
Go into the adjacent building where you’ll find the corpse of Taldan on the ground floor. Talk to it to coax his spirit.
8. Cross over the water to the north to get to the building at 39,39. Just inside you’ll find the corpse of Thundris Windweaver. Talk to it to coax his spirit.
Ahead of you will be Skylord Braax. Kill him.
9. Cross over the water to the south to get to the building at 40,41 where you’ll find the corpse of Sentinel Elissa Starbreeze on the gound floor. Talk to it to coax her spirit.
Go upstairs and kill Cloudtamer Wildmane.
By now you should have 8 Frenzied Cyclone Bracers. If not, kill the necessary Frenzied Cyclones.
10. Go west along the water-side to the moonwell at 39,42.
 Use each Frenzied Cyclone Bracer while standing in the moonwell to destroy it.
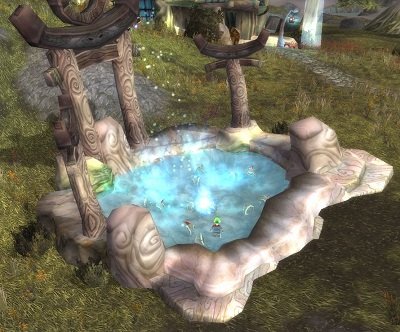
When you’ve destroyed 8 bracers, go to Yalda nearby (39,43) and turn in Coaxing the Spirits – get the follow-up Call Down the Thunder.
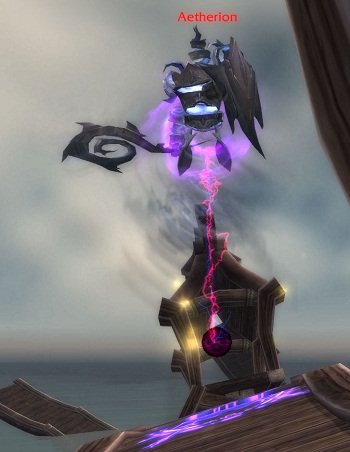
11. Go into the building to the north-west and out along the broken dock. Right-click the orb at the end of the dock to trigger a dialogue between Aetherion and Yalda’s spirit. When the dialogue finishes, kill the Weakened Aetherion.
12. Go back into the same building and up the ramp to the top floor. We’re now going to do another escort quest – remember to always let the NPC get aggro first. Get the quest The Last Refugee from Archaeologist Hollee and escort her around Auberdine for a while before she heads out to the Refugee Camp.
When you’ve completed the escort quest, return to the Refugee Camp ahead of you (42,45) and turn in:
- Against the Wind
- The Last Refugee
- Three Hammers to Break
- Call Down the Thunder
Eye of the Vortex
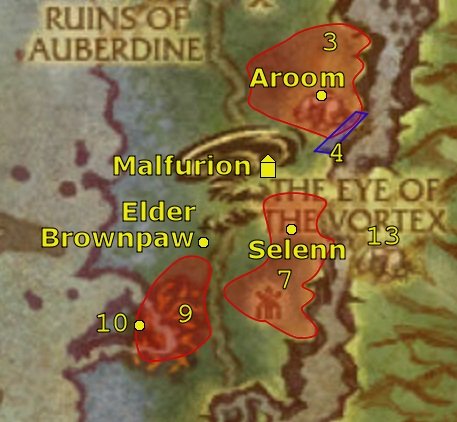
1. Head south and you should spot a path up the mountain at 43,51. Go up the path to find Malfurion (43,53) and turn in Malfurion’s Return.
Get the following quests from him:
- The Land is in Their Blood
- The Last Wildkin
- Protector of Ameth’Aran
2. Head north and you’ll find a small cave, the Moontouched Den, at 44,48. Inside you’ll find Aroom (45,48). Turn in The Last Wildkin and get the follow-up, Aroom’s Farewell.
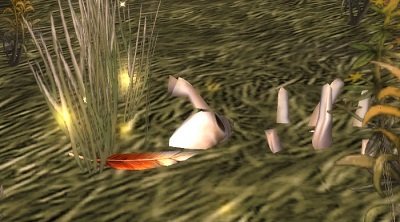
3. Look for Slain Wildkin Feathers in the area around the den. Collect 8 Slain Wildkin Feathers and then return to Aroom (45,48). Turn in Aroom’s Farewell and get the follow-up, Elune’s Fire.
4. Out of the den, head south-east until you’re at the top of a set of cliffs (46,51). Look around the area for Horoo the Flamekeeper who patrols the area. Kill him and loot Elune’s Torch.
5. Return to Aroom in the Moontouched Den (45,48), turn in Elune’s Fire and get the follow-up, The Wildkin’s Oath.
6. Head south to Selenn (44,56), going east around the Eye of the Vortex mountain. Turn in Protector of Ameth’Aran and get the follow-up, Calming the Earth.
7. Kill 8 Enraged Earth Elementals in the area then turn in Calming the Earth with Selenn (44,56). Get the follow-up, Sworn to Protect.
8. Head west to Elder Brownpaw (40,56). Turn in The Land is in Their Blood and get the follow-up, Mutual Aid.
9. In the fiery area south of here, kill 8 Unbound Fire Elementals and use the Soothing Totem on their corpses.
Then return to Elder Brownpaw (40,56) to turn in Mutual Aid and get the follow-up, Soothing the Elements.
10. Between the fiery area to the south and the beach is a cliff face. Climb it from the beach-side to the ruined shrine near the top (39,62).
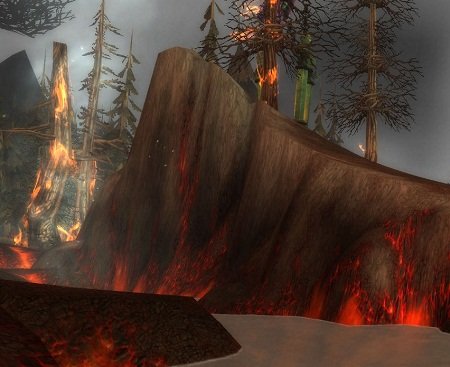
We are going to spawn 5 waves of enemies to kill, so be prepared. The totem will be attacked by a Fire Elemental Remnant, then 3 successive waves of 2 Remnants, and then finally a Fire Elemental Rager.
 When you’re ready, use the Energized Soothing Totem here (moving closer to the top of the cliff if it doesn’t work).
11. Once you’ve successfully defended the totem, return to Elder Brownpaw (40,56), turn in Soothing the Elements and get the follow-up, The Blackwood Pledge.
12. Return to the Eye of the Vortex by going up the path at 42,54. Turn in:
- The Blackwood Pledge
- The Wildkin’s Oath
- Sworn to Protect
Get the quest The Emerald Dream.
13. Head directly east to the river at 46,54, down into the river and across to a path up on the other side. Go through the small Twilight Cultist encampment and into the cave at 47,56.
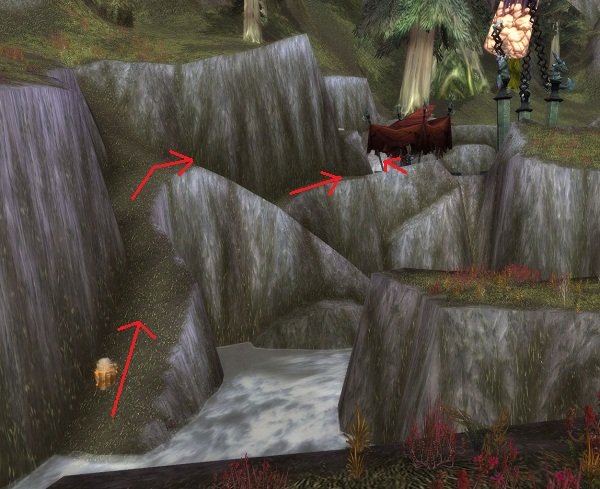
Follow the tunnel down to your right. It will go down, around and up and eventually end at a Nightmare Portal. Right-click the portal to enter the Emerald Dream.
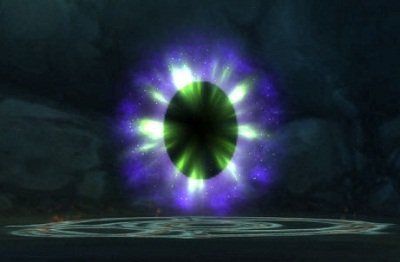
While in the Emerald Dream, turn in the quest The Emerald Dream to the dragon, Thessera, and get the follow-up, The Waking Nightmare.
14. Remaining in the Emerald Dream, follow the tunnel back in the direction you came from. Amongst the Nightmare Spawn, you should soon find a Nightmare Guardian. Kill it and loot the Emerald Scroll.
15. Return to Theserra, turn in The Waking Nightmare and get the follow-up, Leaving the Dream.
She’ll now take you back to Malfurion and out of the Emerald Dream. Turn in Leaving the Dream and get the follow-up, The Eye of All Storms.
This is another vehicle quest. Theserra has two abilities:
 Emerald Barrage – use this to deal damage to the Twilight Portal and to kill Twilight Raiders. Prioritize killing any Twilight Raiders that are attacking you.
 Land Thessera – use this when you’re finished.
Mount Theserra, destroy the Twilight Portal and kill 12 Twilight Raiders. When you’re done, land and turn in The Eye of All Storms. Get the quest, Mounting the Offensive.
Grove of the Ancients
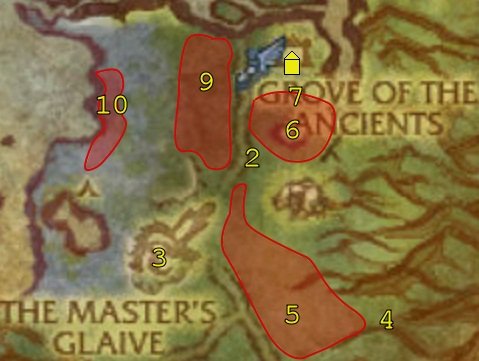
1. Follow the road south to reach the Grove of the Ancients (44,75).
![]() Get the flight path. From now on, we won’t be returning to Lor’danel so if you ever need to train class abilities, you can hearth back to Lor’danel and then take the flight path back to the Grove of the Ancients.
Get the flight path. From now on, we won’t be returning to Lor’danel so if you ever need to train class abilities, you can hearth back to Lor’danel and then take the flight path back to the Grove of the Ancients.
Turn in Mounting the Offensive. Get the following quests:
- Leave No Tracks
- What’s Happening to the Blackwood Furbolg?
- Consumed
2. Head south along the road to Elder Brolg at 43,80. Turn in What’s Happening to the Blackwood Furbolg? and get the follow-up, The Bear’s Paw.
3. Continue south along the road to the Master’s Glaive.
 Before entering the cultist encampment, use the Panther Figurine to enter stealth (rogue/cat stealth won’t work). While in stealth avoid the Faceless Ones (the larger creatures patrolling the area) and avoid falling damage – both will break your stealth.
Go right up to the cultists gathering at the foot of the giant statue at 40,84. This should trigger a conversation amongst them. Stay there until the conversation completes and you get the quest completed message.
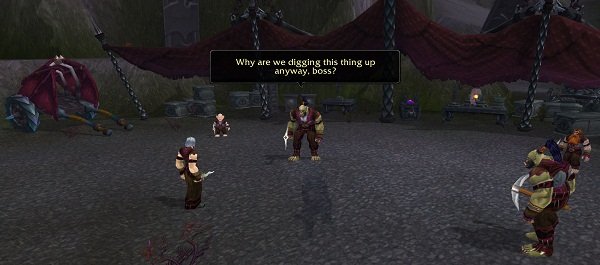
You should now have a completed quest pop-up available that is used for all quests that are turned in while “in the field”. Click it to bring up the quest and turn in Leave No Tracks. Get the follow-up, Stepping Up Surveillance.
Staying in stealth, head west then south circling around the giant statue until you find a path up behind it. Watch out for the Faceless One patrolling this area. Go up the path until you reach a winding ramp, which you can take to continue up the giant statue.
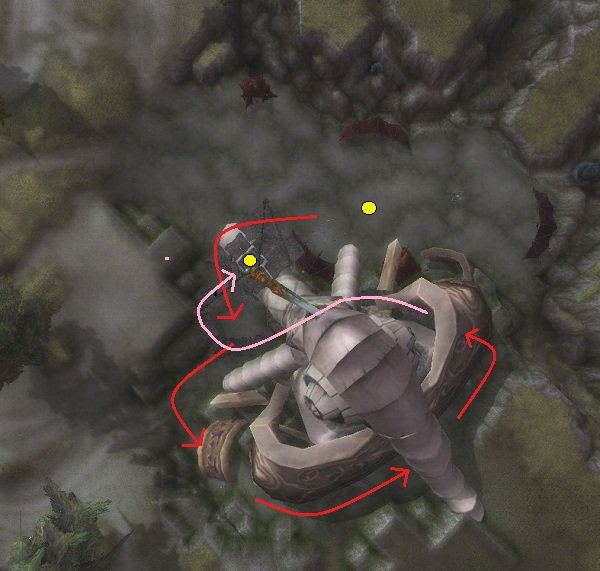
At the top of the ramp is another group of cultists. While in stealth, go right up to them to trigger their conversation. Stay there until the conversation completes and you get the quest completed message.
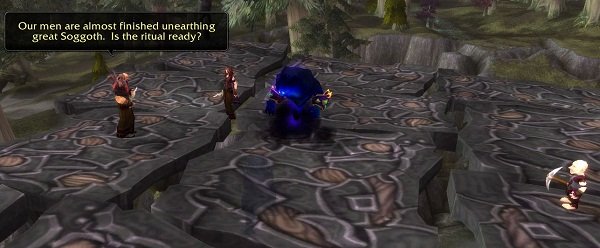
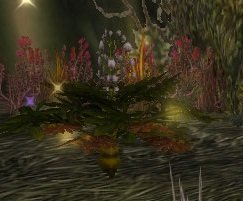
4. Head back down the ramp then leave the area by going east (rather than continuing all the way down the path). On the way to the next quest collect the Bear’s Paw plants in the area.
Go east to the hills at 47,88 where you’ll again meet up with Sentinel Aynasha. Prepare for another quest where you defend against waves of attackers. This one’s a bit harder than the earlier fire elementals but you get a lot of time for each wave which should give you a chance to bandage/eat/drink between waves if necessary. Aynasha will also help you with her bow as long as you’re fighting with her nearby, and if you position yourself behind her, she’ll be the one to get aggro until you pull a furbolg off her. Just don’t let her die. Use any crowd control abilities you have to make the fight easier.
Get the quest One Shot, One Kill and kill the waves: 2 Blackwood Trackers, 3 Blackwood Trackers and Marosh the Devious.
After the fight, wait until Aynasha talks to you and runs off, which will complete the quest.
5. Go back down into the woods and continue looking for Bear’s Paw plants. Once you have the 8 you need, return to Elder Brolg (43,80).
Turn in The Bear’s Paw and get the follow-up, The Bear’s Blessing.
6. While killing Consumed Thistle Bears, go north-east to the watering hole at 45,79. Swim towards the center of the watering hole until you get the “Watering Hole Investigated” message.
Just north of the watering hole, you’ll find Fleetfoot. Kill him and loot his tailfeathers.
Then kill the remaining Consumed Thisle Bears that you need for Consumed.
7. Head north to the Ancient Bear Statue at 45,76.
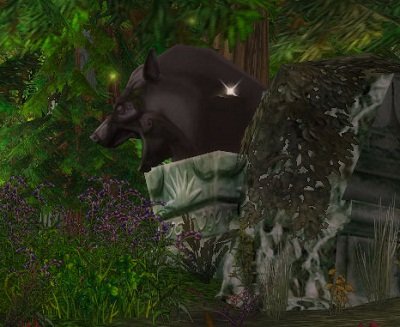
 Use the Bear’s Paw Bundle to make a Blessed Herb Bundle.
8. Return to the Grove of the Ancients (45,75) and turn in:
- Stepping Up Surveillance – get the follow-up quest, Unearthed Knowledge, from Larien just nearby
- Consumed – get the follow-up, The Seeds of Life
Talk to Onu, the Ancient just a bit to the east of the quest giver, for a Seed of the Earth.
9. Cross over the road to the west and start looking for a Darkshore Wisp flitting around. They move around quickly and often far off the ground so you might need a bit of luck and patience here. Catch up with one on the ground and loot it for a Seed of the Sky.
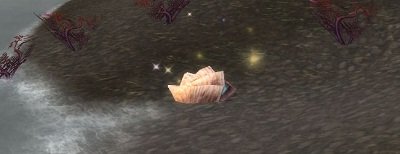
10. Continue west onto the beach and look for a shell (38,78 or further south). Loot it for a Seed of the Sea. A Hermit Tide Crawler will spawn and aggro but shouldn’t be a problem; just be ready for it.
Remtravel’s Excavation/Blackwood Den
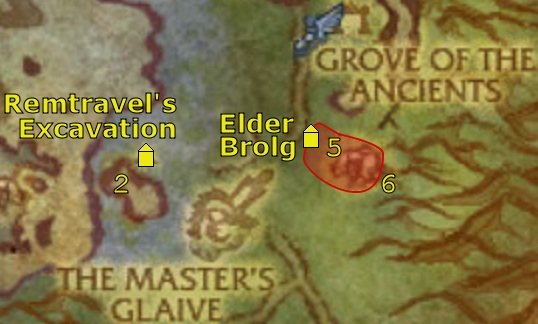
1. Head south along the beach until you reach Remtravel’s Excavation (37,82).
Turn in Unearthed Knowledge and get the following quests:
- Soggoth and Kronn
- Sweeping Clean the Ruins
- Swamped Secrets
The final available quest is an escort quest. You’ll be accompanying Remtravel around the excavation. As always, let him get aggro first before you attack, but you should get quite a few of the murloc kills you need.
When you’re ready, get the quest The Absent-Minded Prospector and escort Remtravel until he returns to Remtravel’s Excavation. You can then turn in The Absent-Minded Prospector.
2. Go down into the flooded excavation at 37,83 where you’ll find the Mud-Crusted Ancient Disc under water. Get it.
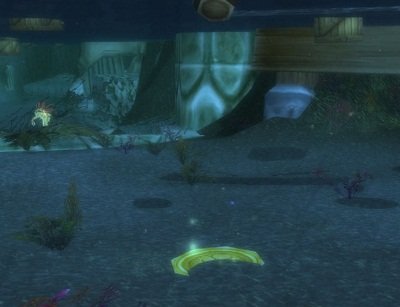
Kill the last Greymist murlocs you need for Sweeping Clean the Ruins.
3. Return to the quest givers (37,82) and turn in:
- Sweeping Clean the Ruins – get the follow-up, Got Some Flotsam!
- Swamped Secrets – get the folow-up, The Titans’ Terminal
4. Head north-east to Elder Brolg (43,80) and turn in The Bear’s Blessing. Get the following quests:
- Cleansing the Afflicted
- Jadefire Braziers
5. Go east into the Blackwood encampment. There are two things we need to do here:
 Use your Blessed Herb Bundle on any of the hostile furbolgs. This will spawn a Spirit of Corruption which you must kill. When the Spirit of Corruption is dead, the furbolg from which it was spawned will become friendly, so don’t kill him before then. If it helps, you can use any crowd control abilities you like on the furbolg while you’re killing the Spirit of Corruption.
- Right-click Jadefire Braziers to destroy them.
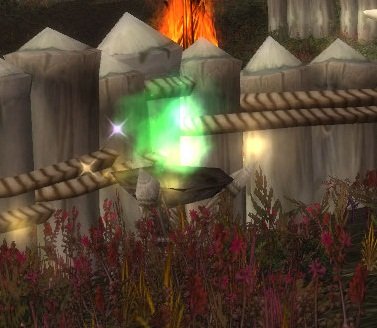
Once you’ve destroyed 8 Jadefire Braziers and killed 7 Spirit of Corruptions, return to Elder Brolg (43,80) and turn in:
- Cleansing the Afflicted – get the follow-up, The Defiler
- Jadefire Braziers
6. Go through (or around) to the far side of the Blackwood encampment, to a cave at 46,83. Inside you’ll find Sharax the Defiler. Kill him.
7. Return to Elder Brolg (43,80) and turn in The Defiler.
Grove of the Ancients/Nazj’vel
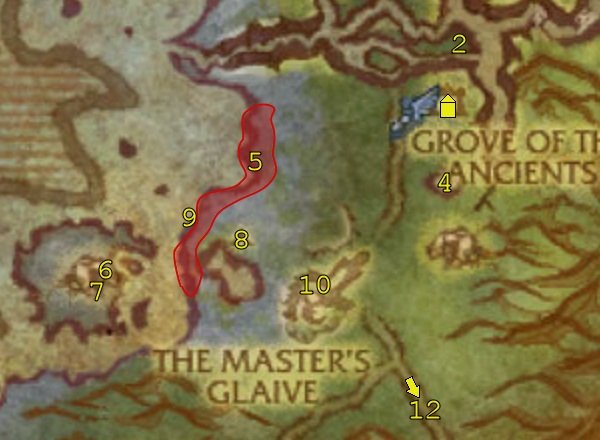
1. Return to the Grove of the Ancients (45,75) and turn in:
- Soggoth and Kronn
- The Seeds of Life – get the follow-up, An Ounce of Preservation
Also get The Slumbering Ancients from Onu, the Ancient.
2. Head north to 45,71. You should find two dead bodies here and can turn in the quest The Slumbering Ancients. Get the quest Naga in Our Midst from the naga body.
 Also look for a Whitetail Stag. There should be at least one nearby. Use the Lifebringer Sapling on it.
3. Return to the Grove of the Ancients (45,75) and turn in:
- An Ounce of Preservation – get the follow-up, In Defense of Darkshore
- Naga in Our Midst – get the follow-up, The Darkscale Warlord
Also get The Tides Turn Against Us from Felros nearby.
We’re now going to do the quest In Defense of Darkshore, a bombing run quest which may well be your first. During the quest you’ll be flying on a fixed path. Use the item provided (it will be on your action bar), in this case the  Lifebringer Sapling, and target an area on the ground to include mobs of the type you need to hit in the area. In this run, we’ll be going over an area with Whitetail Deer first, then the Moonstalkers, and finally Grizzled Thistle Bears. Try to hit the necessary number of the creature type before you’re moved on to the next area. If you don’t get all of the required numbers, it’s not a problem. You can repeat the bombing run without losing credit for the hits you’ve already made.
When you’re ready, talk to Orseus by the flight path to begin the bombing run.
When you’re done, go back into the grove and turn in In Defense of Darkshore and get the follow-up, The Devourer of Darkshore.
4. Go south to the shore of the watering hole that we visited before (45,78).
 Use the Lifebring Sapling. Wait for Yoth’al the Devourer to spawn and aggro, then kill him.
5. Head west to the beach (39,78).
Now head south along the beach and perform the following two tasks:
- Collect Greymist Debris which should be lying about on the beach or just in the water.
 Use the Buried Artifact Detector. It will generally reveal a few piles of dirt which you can use to get random junk and the occasional Ancient Device Fragment. Repeat as you go until you have 5 Ancient Device Fragments Use them to create an Ancient Slotted Device.
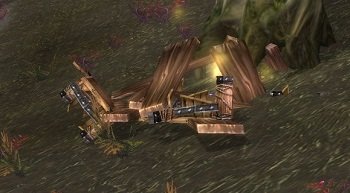
6. Once you’ve obtained 5 Greymist Debris and created the Ancient Slotted Device, swim out to Nazj’vel, an island off the coast of Remtravel’s Expedition. Enter the cave at 33,83.
Follow the route to your left. Ignore the dead-end branch to your left as you follow the tunnel around clockwise. In the cavern at the end of the tunnel, you’ll find Warlord Wrathspine. Kill him, immediately turn in The Darkscale Warlord from the corpse and get the follow-up, The Offering to Azshara.
7. Leave the cave following the same route by which you came in. Just out of the cave you’ll see a path heading up to your right. This leads to an area above the cave (32,84) where 4 naga are protecting the Horn of the Ancients. You should be able to pull each naga individually. Kill them all.
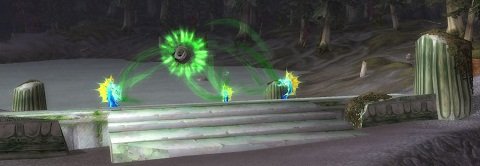
A dialogue between Azshara and Malfurion will then play out – as soon as the dialogue ends, quickly turn in The Offering to Azshara and get the follow-up, The Battle for Darkshore (if you wait too long, Malfurion will despawn and you’ll have to kill the naga again).
By now you should have killed enough Darkscale Myrmidons to complete The Tides Turn Against Us. If not, kill any more of the naga that you need.
8. Swim back to shore and to Remtravel’s Expedition (37,82). Turn in:
- Got Some Flotsam? – get the follow-up, A New Home
- The Titans’ Terminal
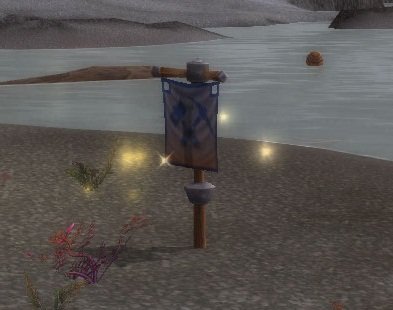
9. Go to the banner on the beach at 35,81.
 Without being too close to the banner use your Marvelous Mobile Murloc Manor Maker and wait until you get the quest completion message. (If you were too close, you might get stuck in the new murloc home – in that case, just wait for it to despawn.)
Return to the archaeologists (37,82) and turn in A New Home.
10. Head east to the Master’s Glaive (39,83) where a battle should be in progress. You can ignore the confrontations between Awakened Ancients and the Spawns of Soggoth. You’ll see the Avatar of Soggoth in the centre of the encampment – don’t attack him just yet!
 Use the Horn of the Ancients on the Avatar of Soggoth and let the attacking Ancients get aggro on him, then kill him.
11. Return to the Grove of the Ancients (45,75) and turn in:
- The Devourer of Darkshore
- The Tides Turn Against Us
- The Battle for Darkshore
Get the quest, Ashes in Ashenvale.
12. Follow the road to the south, going left (east) around the Master’s Glaive, and take the left (south-east) fork in the road. Following the road will eventually take you to Orendil’s Retreat in the Ashenvale zone (27,22). Turn in Ashes in Ashenvale and you can continue with the Ashenvale zone.
Note: you still have 1 quest to turn in, One Shot, One Kill. If you don’t plan on questing in Ashenvale, just continue south to turn it in at Maestra’s Post (26,36).

 by Snowflake
I’ve encouraged authors forI’ve encouraged authors for the addon to try to keep notes to one or two sentences, tops – whatever is needed to get the job done but no more. People using the addon are usually looking for efficiency above all else, and conveying the information in small, easy to read packets is the best way to accomplish that.
Guides like this, on the other hand, can and SHOULD be more detailed. So, pretty much what you’ve experienced is intentional 😉 We can’t please everyone with all our guides, so we have to be a bit more focused in what guides we want to accomplish specific goals. I’m glad that you are still able to find what you enjoy most in a guide with the “paper” guides here on the site!
Sweet!Looks just about perfect! Thank you 🙂
Great Job!Hey Theos!Just started using this guide and it’s been great so far. Sometimes I load up the web version of the guide aswell as the addon because of the maps and to view certain quest items. This has done exactly this and the maps I have used so far have helped alot with the in game addon.Good work! 😀
Fantastic. See I think theFantastic. See I think the addon format is awesome, but I still would much rather have a detailed guide like this one instead. I was so excited to see the addon released, but I have to admit I was a bit disappointed…not in the effectiveness of the addon (you can level quite fast with the addon), but in the detail of the addon.
Enough ranting 😛 Great guide.
Looks excellent as always!Looks excellent as always! Thanks for the hard work!
Looks awesomeLet me know when when you’re done. This looks awesome so far, when you have finished it I’ll promote it to the front page.