Introduction/Notes
This guide will cover the Horde quests in Vashj’ir. I will cover 100% of the quests in the zone. Please note that this is based on a play through of the BETA version of the zone. Things can and probably will change. I will do my best to maintain the accuracy of the quests and objectives until finalized in the live version.
Everything in this guide can be done solo unless I specifically state otherwise. All of the level 80+ zones in Cataclysm make very heavy use of phasing as you progress through the zone. Be aware of this if you are trying to get a group for anything, as they may not be in the same phase as you are.
I will add coordinates to the guide once Blizzard allows for the use of addons in the beta realms.
Vashj’ir presents a unique challenge in describing where you need to go. It is very much a 3D environment, so while I can provide coordinates, often times the objective you need will be above or below you. Keep this in mind as you go through the guide.
I highly suggest you make use to the built-in quest tracking on the world map. I will describe as best I can where the NPCs and quest objectives are, but the objective tracking on the in game map will show you precisely where to go in most cases.
Please post and feedback, errors, or suggestions as comments.
Color Code
- Quests
- Items
- Locations
- Quest objectives to kill
- NPCs
- Coordinates
Table of Contents
- Getting to Vashj’ir
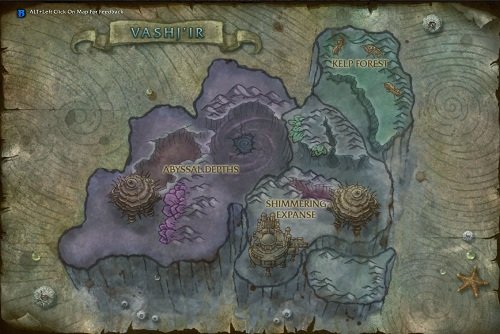
- The Kelp Forest
- The Shimmering Expanse
- Northern Shimmering Expanse
- Southern Shimmering Expanse
- The Abyssal Depths
Getting to Vashj’ir
1. Find the Warchief’s Command Board. Click on it and take the quest Warchief’s Command: Vashj’ir.
2. Head Bladefist Bay, which is outside Orgimmar and to the east. Turn in Warchief’s Command: Vashj’ir to Commander Thorak.
3. Accept Call of Duty . Head to the end of the dock. A small event will happen with warriors talking about recent events. Just wait around for the mercenary ship to arrive.
Once it arrives, board the ship. The crew should be familiar. The boat will depart for Vashj’ir but you won’t quite make it…
When you regain consciousness, speak to Erunak Stonespeaker to turn in [80] Call of Duty.
The Kelp Forest
1. Accept Sea Legs from Erunak Stonespeaker.
Set your hearthstone here as well.
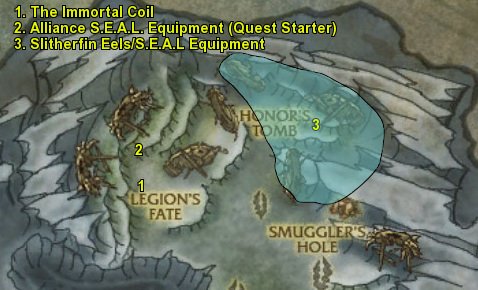
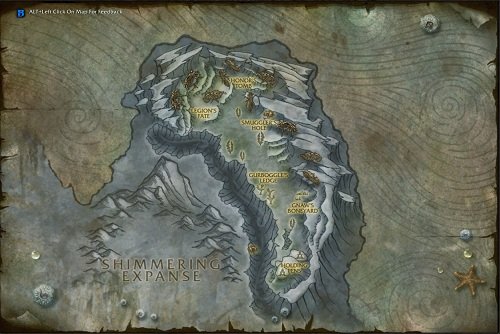
2. Jump in the water and swim out of the ship. You will find everything you need to collect on the sea floor in the area directly around the ship. Return to the ship if you need air. (Map Point 1)

3. Once you have everything, return to The Immortal Coil. Speak to Erunak to turn in Sea Legs. You will now be able to breathe underwater and swim faster as long as you are in Vashj’ir.
4. Accept Pay It Forward.
5. Swim back out of the ship and find a Drowning Warrior nearby. Use the Enchanted Conch to rescue them.
Do this 5 more times to complete Pay It Forward. Return to The Immortal Coil when you are finished.
6. Turn in Pay It Forward to Erunak. Accept Rest For the Weary
7. Talk to Legionnaire Nazgrim just to the left of the room you are in to turn in Rest For the Weary.
8. Accept Buy Us Some Time and Traveling on Our Stomachs from Legionnaire Nazgrim.
9. Swim out of the ship. Kill 8 Zin’Jatari Raiders in the area above and around the ship.
10. Kill Splitclaw Skitterers until you get 8 Succulent Crab Meat.
11. Swim back to the ship and turn in Buy Us Some Time and Traveling on Our Stomachs to Legionnaire Nazgrim.
12. Accept Girding Our Loins.
13. Swim out of the ship, to the piece of Alliance S.E.A.L. Equipment. Click on it to get the quest Helm’s Deep.
14. Return to The Immortal Coil and turn in Helm’s Deep. Accept Finders, Keepers.
15. Search all around the sunken horde ships nearby and collect everything you need. The armor for Girding Our Loins can be found on the seafloor and can also be dropped by Gilblin Scavengers.
16. . Once you have gathered everything for To Arms! , swim east to the Alliance ships. The SEAL equipment is found in large chests inside and around the sunken ships. 
17. While in this area, kill one of the Slitherfin Eels. You will automatically begin the quest Once More, With Eeling. Continue killing eels while looking for the S.E.A.L. Equipment. When you have killed enough eels to complete the quest, click the “Quest Completed” notification to turn it in.
18. Once you have gathered everything for Finders, Keepers go back to Legionnaire Nazgrim inside The Immortal Coil and turn in both quests.
19. Accept Bring It On!. Legionnaire Nazgrim will kill a naga that followed you back to the ship. Turn in Bring It On! and accept Blood and Thunder!
18. As soon as you accept the quest, a small battle event starts outside the ship. Do your best to stay alive. The warriors will get carried off one by one, and eventually you will get captured as well. Erunak rescues you and leads you to the next quest hub, Shallow’s End.
Turn in [81]Blood and Thunder!.
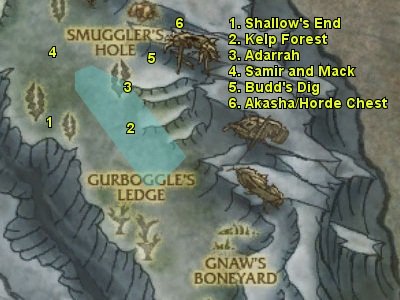
1. Speak to Moanah Stormhoof. Accept the quest [81]Better Late Than Dead.
2. Enter the Kelp Forest (Map Shaded Area 2) and look for a Sea Turtle. When you find one, use Moanah’s Baitstick. Once you are riding the turtle, swim back toward Shallow’s End. You are going to get…dismounted. There is no way to avoid it so don’t feel bad. Swim the rest of the way back to Shallow’s End.
3. Turn in [81]Better Late Than Dead.
4. Pick up The Abyssal Ride from Moanah.
5. Go to the back of the large shell behind Erunak to find the coil of rope. Use the coil of rope to send the bait out into the chasm. A Seahorse will come out and grab the bait. Hop on the seahorse.
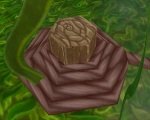
Use the abilities you are given when you are prompted as the Seahorse swims around the zone. If you end up falling off, you will be transported back to the rope to try again. You will find yourself back at Shallow’s End when the Seahorse finishes his run.
6. Turn in The Abyssal Ride to get your underwater mount.
7. Accept the quest Good Deed Left Undone from Rendal Firetongue.
8. Find Adarrah on the east side of the Kelp Forest. Turn in Good Deed Left Undone.(Map Point 3)
9. Accept Gimme Shelter!.
Swim toward Smuggler’s Hole, a small cave just north of where you are. Go inside, until you reach the surface of the water.
Get the flightpoint, then swim back out of the cave to signal Adarrah.
10. Swim back inside and speak to Adarrah to turn in Gimme Shelter!.
11. Accept the followup Ain’t Too Proud to Beg.
12. Swim back out into the Kelp Forest.
13. Go to (?,?), where you will find a crate. Click on the crate to accept A Case of Crabs.
14. You will find Captain Samir and Mack Fearsen at (?,?). (Map Point 4)
Talk to Samir and tell him about Smuggler’s Hole. He will swim off with Mack.
15. If you don’t have a Tattered Treasure Map yet, keep killing Clacksnap Pincers in the area until you get it. Use the map to accept the quest The Horde’s Hoard.
16. Swim back to Smuggler’s Hole. Turn in A Case of Crabs and Ain’t Too Proud to Beg.
17. From Adarrah, accept A Girl’s Best Friend and A Taste For Tail.
18. From Captain Samir, accept Can’t Start a Fire Without a Spark.
19. While you complete the other quests, look for Adarrah’s Jewelry Box on the sea floor. They are small and a little hard to spot. Open them to get Adarrah’s Keepsake for the quest A Girl’s Best Friend.

20. Swim out of Smuggler’s Hole.
21. In the area just east, kill Clacksnap Pincers for A Taste For Tail. You should get a Tattered Treasure Map off one of them. Use it to start the quest The Horde’s Hoard.
22. In the same area, kill Sabreclaw Skitterers until you get a Crumpled Treasure Map. This item will start the quest Kliklak’s Craw.
23. Kliklak can be found patrolling around the kelp forest between Smuggler’s Hole and Shallow’s End. Kill him and loot the Corroded Key.
24. Swim to Shallow’s End and locate the chest at (?,?). Open it to turn in Kliklak’s Craw.
25. Go to Budd’s Dig at (?,?). Pick up the Keg of Gunpowder. (Map Point 5)
23. Just north of Budd’s Dig you will find a sunken Horde ship. Find and kill Akasha, a giant sea serpent that swims around the ship. Loot the Horse Chest Key. (Map Point 6)
23. Swim down just behind the ship to find the Sunken Horde Chest. Open it to turn in The Horde’s Hoard.
 .
.
24. Finish collecting Adarrah’s Keepsake for the quest A Girl’s Best Friend.
25. Return to Smuggler’s Hole.
26. Turn in A Girl’s Best Friend and A Taste For Tail to Adarrah.
27. Turn in Can’t Start a Fire Without a Spark to Captain Samir.
28. Accept the quest Nerve Tonic from Mack Fearsen
29. Accept the quest Ophidophobia from Adarrah
30. Swim back to the sunken Horde ship. Kill any of the Slickskin Eels in the area to get the quest Once More With Eeling. This quest will automatically be accepted as soon as you kill the first eel. Also, kill any Brinescale Serpents you see.
31. While killing sepents and eels, collect the small crates floating all around the ship to complete Nerve Tonic.
32. Once you have finished killing Eels for Once More With Eeling, click the notification that appears in your quest tracker or quest log to turn it in.
33. Swim back to Smuggler’s Hole after you have completed Nerve Tonic and Ophidophobia. Turn in both quests.
34. Get the quest A Desperate Plea from a Broken Bottle at the edge of the water.
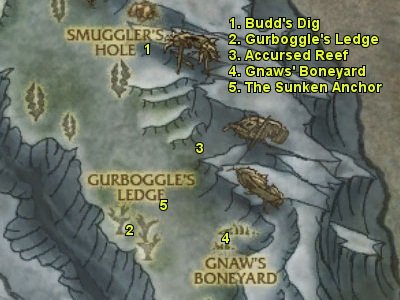
1. Swim back to Budd’s Dig and speak to Budd. Accept the quest Oh, the Insanity.
2. Go to Gurboggle’s Ledge. Kill Gilblin Collectors until you get Lady La-La’s Necklace. Click it to accept the quest [81]Lady La-La’s Medallion.
Continue killing Gilblin Collectors until you get 5 Medallion Fragments. Once you have 5, click on the fragments in your inventory to combine them into Lady La-La’s Medallion. Then use the button in your quest log or on your quest tracker to complete the quest.
3. Collect piles of cannonballs around the clams nearby. You can also get them by killing the Gilblin Hoarders. Do this until you have at least 50 cannonballs.
4. Use the cannonballs to convert them into a Keg of Gunpowder.
5. Next, find Gilbingle at (?,?). Kill him and loot the Waterlogged Journal from him. Use it to accept the quest Blackfin’s Booty
Swim back to Budd’s Dig when you are finished.
5. Turn in Oh, the Insanity. Accept the followup Dah, Nunt…Dah, Nunt….
6. Swim to The Accursed Reef (Map Point 3). Find the Rusty Harpoon Gun and use the Booby-Trapped Bait.
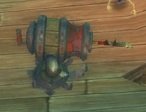
The shark will come and eat the bait, then the quest complete box will appear. Turn in Dah, Nunt…Dah, Nunt…. Accept the followup Shark Weak.
7. Collect 5 of Gnaws’ Teeth.

8. Find Blackfin. He is an orca that swims in the waters above The Accursed Reef. Kill him and loot Gliblingle’s Map.
Once you are done, swim back to Budd’s Dig.
9. Turn in Shark Weak. Accept DUN-dun-DUN-dun-DUN-dun.
10. Go back to the Rusty Harpoon Gun. Use Budd’s Chain.
You will be picked up by Gnaws. Use the “Fire Harpoon Gun” ability when prompted. Once Gnaws dies, you will be in Gnaws’ Boneyard. Swim back to The Accursed Reef.
11. Budd is now a skeleton standing next to the Rusty Harpoon Gun. Talk to him to turn in DUN-dun-DUN-dun-DUN-dun.
Accept A Bone To Pick.
12. Swim back over to Gurboggle’s Ledge.
Find King Gurboggle at (?,?). Kill him and collect The Pewter Pounder.
13. Swim just south of King Gurboggle to the Sunken Anchor. There will be a small dirt pile next to it. Turn in Blackfin’s Booty.
Return to The Accursed Reef.
14. Talk to Budd and turn in A Bone To Pick. Accept Decisions, Decisions.
15. Use The Pewter Pounder on The Porcelain Prophet next to you. Budd will turn back into a human. Turn in Decisions, Decisions.
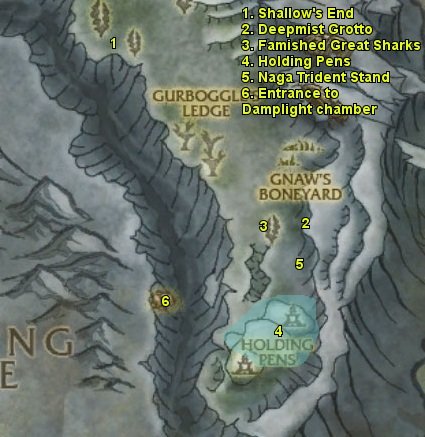
1. Swim back to Erunak at Shallow’s End.
2. Turn in A Desperate Plea and accept Undersea Sanctuary.
Use Erunak’s Scrying Orb to view Deepmist Grotto.
3. Turn in Undersea Sanctuary. Accept the followup Spelunking.
4. Go to Deepmist Grotto. Speak to Gurrok and turn in Spelunking.
Erunak and the other NPCs from Shallow’s End will show up. Speak to Erunak to set your hearthstone here.
5. Accept the quest Debriefing from Erunak.
Talk to Gurrok. Listen to his story, then speak to Erunak to turn in Debriefing.
6. Accept Wake of Destruction.
7. Swim out of the grotto and head just a bit west, where you will find the Famished Great Sharks. Target one of the sharks while staying far enough away that it doesn’t attack you and use the Orb of Suggestion.
Once you finish channeling the spell, the shark will swim over to you and you will jump on its back. The shark will constantly swim forward, you just control the direction.
Swim toward the Holding Pens. (Shaded Area 4)
8. Swim near the Zin’Jatar Guardians and use the ability “Eat Naga” to cause the shark to attack one of the naga guards. You don’t actually have to target the naga, just swim near them. Keep using the ability any time it is not greyed out until you have devoured 25 Zin’Jatar Guardians. Then use the “Return to Safety” ability to have the shark swim you back to the entrance of the Deepmist Grotto.
9. Enter the grotto and turn in Wake of Destruction.
10. From Moanah Stormhoof, accept the quest Decompression.
From Gurrok, accept the quest What? What? In My Gut…?.
From Rendel Firetongue, accept the quest Come Hell or High Water.
11. All of the quests you have are completed in The Holding Pens area. Mount up and swim over there.
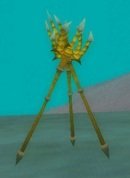
12. Go to (?,?) where you will find a Naga Trident Stand. Click it to accept the quest How Disarming. While you are doing the next 4 quests, find and destroy 6 Naga Trident Stands. They can be found all around the Holding Pens.
13. In the same area where you killed the Zin’Jatar naga with the shark, kill 12 Zin’Jatar Guardians, Overseers, or Pearlbinders for Come Hell or High Water. They can also drop the Wiggleweed Sprout you need for What? What? In My Gut…?. Once you have killed enough, click the “Quest Completed” notification that pops up to turn in Come Hell or High Water. Accept the followup, The Warden’s Time.
14. Continue killing naga until you get enough Wiggleweed Sprout to complete What? What? In My Gut…?. You can also get them by killing the Shimmerspine Harvesters which are the orange murlocs walking around.
15. Swim toward the Imprisoned Warriors further into the camp. They almost look like large pearls from a distance. Use the Breathstone on them to rescue the soldiers. Do this 10 times to complete Decompression
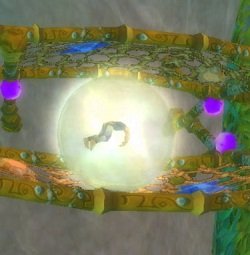
16. Finally, swim all the way up to the top ledge of the camp, where you will find the Zin’Jatar Warden. Kill him to complete The Warden’s Time.
17. Swim back to Deepmist Grotto and turn in all your quests.
18. From Erunak, accept Across the Great Divide.
19. Leave Deepmist Grotto, mount up and swim across the Abyss, over to the entrance of Damplight Chamber.
The Shimmering Expanse
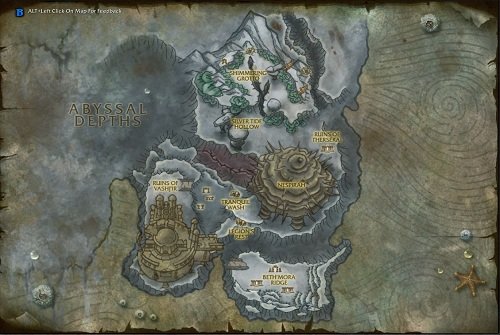
1. Enter the cave and swim through the tunnel until you can surface. You will see a small landing with a bonfire on it. Next to the fire you will find Farseer Gadra.
Speak to him to turn in Across the Great Divide.
2. Accept the followup, A Looming Threat.
Speak to Farseer Gadra and tell him you are ready to enter the vision. after a few seconds you will be pulled into a vision. Gadra will explain the current situation in Vashj’ir.
When he is finished speaking, speak to him again to turn in A Looming Threat and be transported back to Damplight Chamber, which is not a peaceful as when you left.
3. From Farseer Gadra, accept the quest Backed Into a Corner.
You will need to fight off the naga until 50 have been defeated. This won’t take as long, as you have a lot of help. Once 50 naga have been defeated, Fathom-Lord Zin’jatar comes out. Let the NPCs and elementals pound on him for a few seconds, so he focuses on them, then start helping them kill him.
Once he is dead, speak to Farseer Gadra.
4. Turn in Backed Into a Corner. Then go to the north side of the small island you are on and get the quest Rundown from Toshe Chaosrender.
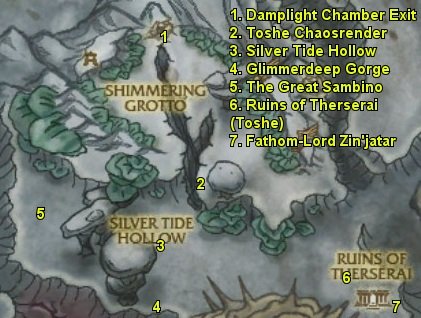
1. Swim west out of the chamber. When you come out of the tunnel, you will see naga swimming off to your left. Use Toshe’s Hunting Spears to kill 20 naga.
When you are finished continue to swim south to (?,?) where Toshe Chaosrender is waiting for you.
2. Turn in Rundown and accept the followup, Silver Tide Hollow.
3. If you look southwest from where you are at, across the Silver Tide Trench and down a bit, you will see the entrance to Silver Tide Hollow. Swim over there and enter.
Once you surface, get the flightpoint.
4. Speak to Felora Firewreath to turn in Silver Tide Hollow. Accept Distracting Scent and The Great Sambino.
5. Accept the quest Don’t be Shellfish from Earthmender Duarn.
6. From Caretaker Movra, accept Slippery Threat.
Also, set your hearthstone here.
7. Swim out of Silver Tide Hollow and mount up. All around the entrance you will see naga bodies. Swim close to one and right-click it to start dragging the body.
Swim south to Glimmerdeep Gorge. As soon as you are over the gorge you will drop the naga you are dragging. Drag 3 bodies into the gorge to complete Distracting Scent.
8. Swim down to the sea floor from the entrance to Silver Tide Hollow.
Kill 12 Spiketooth Eels. While doing this, find and collect 10 Coilshell Sifters.
9. Swim west to (?,?), where you will find The Great Sambino.
Speak to him to turn in the quest of the same name.
10. From The Great Sambino, accept Undersea Inflation. Also pick up Crabby Patrons from Felice.
11. Kill 10 Green Sand Crabs. While you are doing that, use Sambino’s Air Balloon near any of the large blueish shells on the sea floor or the green coral formations to fill up the balloon. Keep doing this until you get the message that the balloon is full.
If you have not gotten Sambino’s Air Valve by the time you have finished killing 10 crabs, keep killing them until it drops.
12. Return to The Great Sambino. Turn in both quests. Accept Totem Modifaction from Sambino.
13. Go to one of the brown/orange patches on the ground and use Sambino’s Modified Strength of Earth Totem. Defend the totem from whatever sea life comes to destroy it until the Enormous Sea Crab appears. Kill him to complete Totem Modifaction.
14. Turn in Totem Modifaction and accept Back in One Piece.
15. Swim back to Silver Tide Hollow. Turn in all of your quests.
Accept Toshe’s Vengance from Felora Firewreath.
16. Swim east, past Nespirah, to the Ruins of Therserai Temple. You will find Toshe Chaosrender at (?,?).
Turn in Toshe’s Vengance
17. Accept the quests Vengeful Heart and Vortex.
18. Use the Globes of Tumultuous Water to suck up the swarming serpents. Also, kill Zin’jatar Ravagers in the area until you complete Vengeful Heart. Make sure the areas where you fight the naga are clear of snakes, otherwise the nage will command the snakes to attack you.
When you have finished both quests, return to Toshe.
19. Turn in Vortex and Vengeful Heart. Accept the followup, Fathom-Lord Zin’jatar.
20. You will find Fathom-Lord Zin’jatar in the southwest corner of the ruins. Kill him. Even though he is an Elite, he doesn’t hit very hard and you should have no trouble.
After he is dead, loot a Luminescent Pearl from him. Use it to get the quest A Pearl of Wisdom.
21. Return to Toshe and turn in Fathom-Lord Zin’jatar.
22. Swim back to Silver Tide Hollow. Speak to Earthmender Duarn to turn in A Pearl of Wisdom.
Accept the followup, Nespirah.
At this point we are going to be questing inside of Nespirah. I tried to get a map of the subzone but I could not find one. I’ll try to describe as best I can where to go. If someone can get me a map of the inside of Nespirah I would greatly appreciate it and would give credit to you in the guide. For now I will just use the map for Southern Shimmering Expanse.
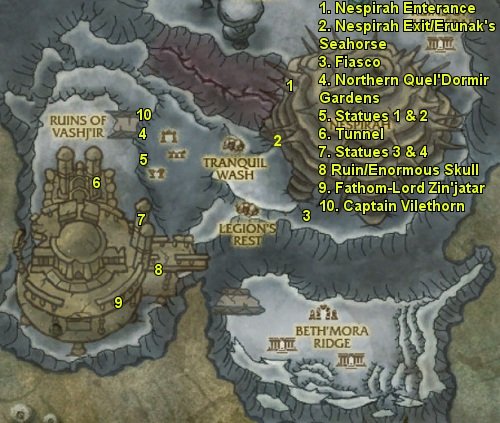
1. Swim to the entrance of Nespirah and go inside.
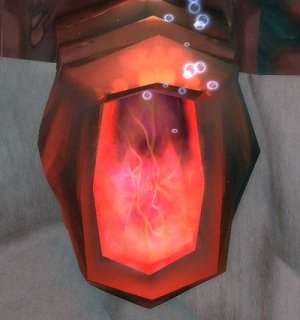
2. Erunak and Earthmender Duarn will appear after you go inside. Follow them as they explore.
3. After Erunak leaves, speak to Earthmender Duarn to turn in Nespirah.
Accept the followup Making Contact. Speak to him again, tell him you are ready for him to attempt to communicate with the creature.
4. Turn in Making Contact one Duarn has finished.
5. Take both quests that Duarn offers you, Slave Labor and Stick it to Them.
6. Go back out into the main chamber. Use Duarnn’s Rope near any Enslaved Pearl Miners to rescue them. The miners can be found near and of the pearl clusters.
While doing this, kill 7 Idra’kess Sentinels and 7 Idra’kess Enchantress, which can be found all over the chamber.
7. When you have completed both quests, return to Earthmender Duarn in the smaller room to the northwest.
Turn in both quests and accept the followup, Capture the Crab.
8. Go back to the main chamber and look around the edges until you find a naga with a Deepseeker Crab following it. Kill the naga then use Duarn’s Net on the crab.
Once the crab is caught in the net, click on it to pick it up.
9. Return to Earthmender Duarn. Turn in Capture the Crab
10. Accept the followup, Breaking Through. Then tell Duarn that you are ready to speak to Nespirah.
Once the quest is complete, speak to Duarn again to turn it in.
11. Accept We Are Not Alone.
12. Leave the brain room and turn right. Follow the outside edge of the main chamber until you find Legionnaire Nazgrim at (?,?).
13. Turn in We Are Not Alone. Accept the followup Body Blows.
14. From Captain Vilethorn, accept the quest Hopelessly Gearless.
15. Finally, from Wavespeaker Tulra, accept the quest Still Valuable.
16. While completing the other two quests, kill any naga in the area until you have looted 5 Mysterious Pearls
17. Find Idra’kess Weapon Racks and loot the Purloined Polearms from them. You need 4 total.
18. While doing that, and killing naga, find 7 Nespirah Abscesses and attack them. They are small redish nodes along the walls. They can be hard to spot, as they blend in with everything around them.
19. When finished with all three quests, return to where the prisoners were and turn all of them.
20. From Legionnaire Nazgrim, accept Overseer Idra’kess.
21. Follow the outside wall directly behind Legionnaire Nazgrim, keeping the wall on your right. Keep going, heading generally northwest, until you reach a tunnel leading up. Follow this tunnel until you get to the upper chamber. In the back of this chamber, directly opposite the tunnel, you will find Overseer Idra’kess.
22. Overseer Idra’kess is a level 80 Elite, but he does not really hit all that hard. Make sure you are at full health/mana and attack him.
First, kill the two caster that are with him to drop his shield. Attack him and get his health down to about 40%. Several Nespirah Fluids will spawn. Drag the Overseer over the fluids. He will take a large amount of damage each time you do. Finish him off to complete Overseer Idra’kess.
Once he is dead, go back down the tunnel and return to Earthmender Duarn in the “brain room” on the west side of the main chamber.
23. Turn in Overseer Idra’kess. Accept Waking the Beast.
mand you will be taken to the next quest hub, Legion’s Rest.
25. Speak to Legionnaire Nazgrim to turn in Waking the Beast. Accept Deep Attraction.
26. From Wavespeaker Tulra accept Something Edible.
27. Finally, get Shelled Salvation from Captain Vilethorn
27. Leave Legion’s Rest and swim up and to the east. Along the way, collect any Spiralung you see on the ground. They look like small conch shells. Give these to the Nespirah Survivors floating over the air vents to rescue them. Also, kill any Snapjaw Groupers and Redgill Scavengers you see.
28. Go to (?,?), where you will find Fiasco Sizzlegrin. Get the quest in Crafty Crabs.
29. Collect Fiasco’s Spare Parts off the sea floor in the area just south of Nespirah. You can also get them by killing the Sandskin Pincers, though not every crab will drop one.
Continue killing Snapjaw Groupers and Redgill Scavangers, resuing Nespirah Survivors and collecting Fiasco’s Spare Parts in this area until you have completed all of your quests.
30. When you have all the spare parts, return to Fiasco Sizzlegrin and turn in in Crafty Crabs.
31. Return to Legion’s Rest and turn in all your quests.
32. At the center of the cave, find Elendri Goldenbrow and get the quest An Occupation of Time.
Run back over to Legionnaire Nazgrim and accept Swift Approach.
Finally, get both quests from Captain Vilethorn, A Better Vantage and Caught Off-Guard.
33. Swim out of Legion’s Rest, to the ruins directly west.
In this area, you need to kill 12 Azsh’ir Patroller, and destroy 8 Azsh’ir Monitors. Do this while completing the other steps.

34. Find the Northern Quel’Dormir Gardens at (?,?) (Map Point 4)
35. Go just south to (?,?) and click on the plaques under the statues of Queen Azshara and Lady Vashj. (Map Point 5)
36. Swim southwest into the tunnel at (?,?). (Map Point 6)
37. Head southeast from the tunnel to the other two statues at (?,?). (Map Point 7)
38. Swim a little more south to the ruins at (?,?). You will also see a dagger in a skull toward the back of these ruins. Click it to accept the quest Upon the Scene of Battle. (Map Point 8.)
39. Make sure you have finished destroying the monitors and killing the patrollers.
40. When you are done, return to Legion’s Rest.
Turn in all of the quests.
41. From Wavespeaker Tulra, accept Visions of the Past: The Invasion of Vashj’ir.
42. Go back to where you found the Enormous Skull. Use the Blade of the Naz’jar Battlemaiden. You will be phased into a vision of the past. In this vision you are inhabiting the body of a Naz’jar Battlemaiden.
Speak to Fathom-Stalker Azjentus in front of you and accept the quest Reoccupation.
43. Swim all through the ruins killing Kvaldir until you complete the quest. The first ability on your hotbar is your main attack. The second ability can be used to pull. Return to Fathom-Stalker Azjentus when you are done.
44. Turn in Reoccupation and accept the followup The Revered Lady.
45. Swim north to where the first two statues were found. Speak to Lady Naz’jar to turn in the quest The Revered Lady.
Accept the followup, To the Fathon-Lord’s Call. You will gain a new ability called Vicious Charge, which will cause you to charge a target, dealing damage to everything in your path.
46. Get the quest Build to Last from the Sira’kess Tide Priestess just behind Lady Naz’jar.
47. Swim up to the terrace above you. Kill 16 Kvaldir up here, while activating the defenses around the city. They look like small blue basins.
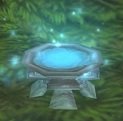
48. When you have completed both quests, swim south along the terrace to Fathom-Lord Zin’jatar. (Map Point 9)
Turn in Build to Last to the Sira’kess Tide Priestess.
49. Turn in To the Fathon-Lord’s Call to Fathom-Lord Zin’jatar.
Accept the followup Not Soon Forgotten.
50. Swim up the tunnel in front of you until you find Varkul the Unrelenting. He will be surrounded by 5 Sira’kess Sea Witches and some other naga. As long as they are not being attacked, they will channel spell that causes Varkul to take increased damage. So Attach Varkul until he calls in the other kvaldir. Then let the other naga tank him while you kill off the adds.
51. When he is dead, you will get an auto-complete notification. Click it to turn in Not Soon Forgotten.
52. You will be teleported back to the platform you started on and returned to your body. Turn in Visions of the Past: The Invasion of Vashj’ir to Wavespeaker Tulra, who is now standing in front of you.
Accept Looking Forward
53. Swim north, staying on the same level. At (?,?) you will find a small building. Go inside to find Captain Vilethorn. Turn in Looking Forward.
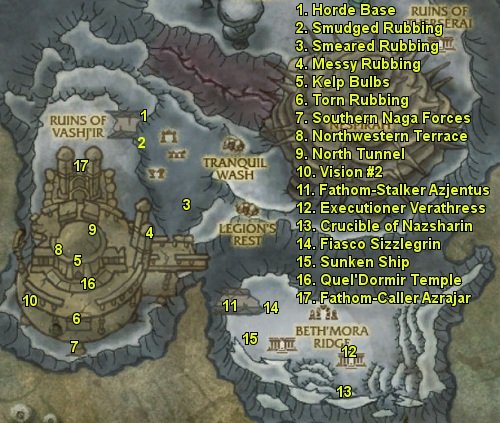
1. From Captain Vilethorn, accept Clear Goals.
Right next to him, from Legionnaire Nazgrim, accept Not Entirely Unprepared.
Lastly, in the back, get accept Curious Distraction.
2. Just outside, get Properly Inspired from Fiasco Sizzlegrin.
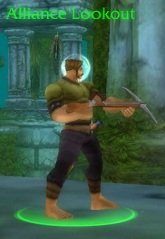
3. Swim just south of the camp, into the ruins. Find 8 Horde Lookouts and use the Box of Crossbow Bolts while targeting them to complete Not Entirely Unprepared.
4. Head to (?,?) to find the first elven tablet. Click it to get the Smudged Rubbing.
5. Next go to (?,?) to get the Smeared Rubbing from the second elven tablet
6. The third tablet is located at (?,?). Click it to get the Messy Rubbing.
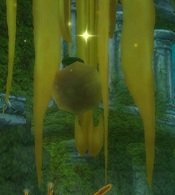
7. A little to the west you will find a path into the lower level of the ruins. Swim in there, to (?,?) where you will find Kelp Bulbs hanging from the ceiling. Collect 8 of these.
8. The last table is located at (?,?). Get the Torn Rubbing.
9. Finally, kill 10 of the naga forces at the south end of the ruins for Clear Goals.
10. Return to the Horde Base. Turn in Properly Inspired to Fiasco Sizzlegrin.
11. Inside, turn in Not Entirely Unprepared to Legionnaire Nazgrim.
12. Turn in Clear Goals to Captain Vilethorn.
Accept Swift Action
13. Turn in Curious Distraction to Elendri Goldenbrow.
9. Go outside and speak to Fiasco Sizzlegrin to begin the quest. You will be mounted on a seahorse and begin a bombing-run type mission. Just use the only ability on your vehicle bar to blow up as many naga as possible. You will continue to circle the area until you have killed 150.
Once you have blown up enough naga, you will be automatically taken to the Nar’shola Terrace, where Captain Vilethorn is waiting.
10. Turn in Swift Action.
11. From Captain Vilethorn, accept Gauging Success.
Right next to him, get the quest Fallen But Not Forgotten.
12. While doing the next two steps, look for Injured Assault Volunteers. Speak to them to send them back to the rendezvous point.
13. Go to (?,?) to scout the North Tunnel.
14. Go to (?,?) to scout the Northwestern Terrace.
Return to the Rendezvous Point when you have finished both quests.
15. Turn in Fallen But Not Forgotten to Legionnaire Nazgrim.
16. Turn in Gauging Success to Captain Vilethorn.
17. Accept Visions of the Past: The Slaughter of Beth’mora from Wavespeaker Tulra.
18. Swim up the tunnel directly west. At the far end is the location where you start the second vision. Use the Blade of the Naz’jar Battlemaiden to begin.
19. Speak to Lady Naz’jar and accept the quest By Her Lady’s Word.
20. Swim east through the tunnel. In the middle of the tunnel, you will find Fathom-Lord Zin’jatar. Speak to him to get his troops’ assistance.
21. Continue east to Overseer Idra’kess. Speak to him to get more help.
22. Lastly, you will find Lady Sira’kess just a bit more east, near the end of the terrace. Speak to her to finish By Her Lady’s Word.
23. Swim east to Beth’mora Ridge. Find Fathom-Stalker Azjentus at (?,?).
Turn in By Her Lady’s Word.
24. Accept No Trespass Forgiven.
From the Naz’jar Honor Guard just north of Azjentus, accept Stolen Property.
25. Swim to (?,?), killing any kvaldir on your way. There you should find Executioner Verthress. From him, accept the quest Setting An Example
26. Find a Kvaldir High-Shaman in one of the buildings to either side of you. You don’t have to kill him, simply kite him back to Executioner Verthress. Once there, Verthress will kill the shaman and you will get the quest complete message. Turn in Setting An Example.
27. Swim into the ruins directly south. You will find the Crucible of Nazsharin at (?,?). Click it to turn in Stolen Property.
Accept the followup, Chosen Burden.
28. Return to Fathom-Stalker Azjentus. Turn in No Trespass Forgiven.
29. Speak to Lady Naz’jar to turn in Chosen Burden.
Accept The Culmination of Our Efforts. This will complete Visions of the Past: The Slaughter of Beth’mora. You will be teleported back to the terrace you began the vision on.
30. Speak to Wavespeaker Tulra to turn in Visions of the Past: The Slaughter of Beth’mora. Accept the followup Losing Ground.
31. Swim to the Forward Post. As soon as you get there, you will be told that the naga attacked the base while you were gone.
Swim to Legion’s Rest.
32. Turn in Losing Ground and accept the followup Desperate Plan.
33. Swim to Fiasco Sizzlegrin at (?,?). Turn in Desperate Plan.
34. Accept Unfurling Plan and Come Prepared from Fiasco Sizzlegrin.
From Bloodguard Toldrek accept Hostile Waters.
35. Head into the ruins directly south and kill kvaldir until you have 8 Coils of Kvaldir Rope. You can also find coils of rope on the ground.
36. Swim to the sunken ship on the western side of the ridge. Kill 10 Muckskin Scroungers for Hostile Waters.
37. Swim inside the ship to find the Horde Survival Kit for Come Prepared
38. Return to Fiasco Sizzlegrin. Turn in all three quests.
Accept Honor and Privilege.
39. Swim straight up to the surface. You should see a rescue balloon and Bloodguard Toldrek.
Loot the Rescue Flare from the crate next to Toldrek and use it to fire a flare at the Alliance ships.
Talk to Toldrek to turn in Honor and Privilege. Accept Welcome News.
Swim back to Legion’s Rest.
40. Turn in Welcome News to Legionnaire Nazgrim.
From Wavespeaker Tulra, accept Visions of the Past: Rise From The Deep.
41. Swim to the Quel’Dormir Temple, on the top terrace of the Ruins of Vashj’ir. In the center of the temple, you will find the Crucible. Swim op to a ledge just behind to find the point where you can enter the vision. Use the Blade of the Naz’jar Battlemaiden.
42. Accept the quest Devout Assembly from Lady Sira’kess.
43. Accept Her Lady’s Hand from Lady Naz’jar just outside the temple.
44. All around the temple you will find Sira’kess Tide Priestesses. Talk 6 of them to send them back to the temple.
While doing this, kill any of the Kvaldir fighting the Naz’jar Honor Guards. When the guards are out of combat, you will automatically send them back to the temple. Do this 8 times.
45. Swim to (?,?) to find Fathom-Caller Azrajar. Speak to him to send him back to the temple as well.
Return to the temple.
46. Turn in Her Lady’s Hand to Lady Naz’jar.
47. Inside the temple, turn in Devout Assembly to Lady Sira’kess.
Accept At All Costs.
48. Kill 20 Kvaldir as they try to enter the temple. When you are finished, turn in At All Costs to Lady Sira’kess.
49. Swim out of the temple to the east, where you will find Lady Naz’jar. Kill Kvaldir until you get the quest complete message.
Once finished, turn in At All Costs to Lady Naz’jar. You will be returned to your body.
Swim back to Legion’s Rest.
50. Turn in Visions of the Past: Rise From The Deep.
51. Accept A Breath of Fresh Air.
52. Swim to around (?,?). You can use the Boom Boots to get to the surface quickly. Legionnaire Nazgrim is on the northernmost Horde ship. Speak to him to turn in A Breath of Fresh Air.
Accept the followup Full Circle This is listed as a placeholder so the questname may change.
53. Get on board the sub once it arrives. You will be taken to Tenebrous Cavern, the next questhub.
The Abyssal Depths
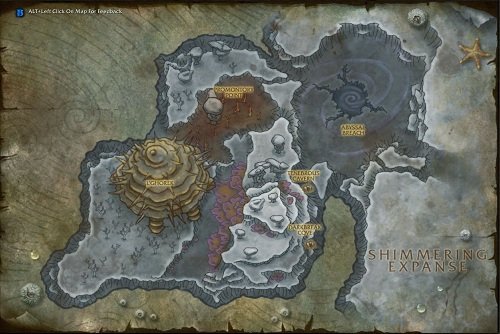
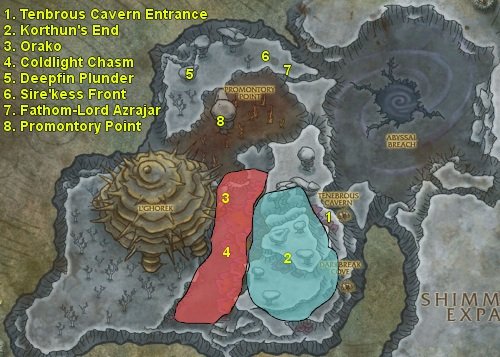
1. Speak to Captain “Jewels” Verne to turn in Full Circle. Accept When in Vashj’ir….
2. From Fiasco Sizzlegrin get the quest Environmental Awareness.
3. Swim out and up to the ridge above you. Go to the top of one of the tall pillars with the red kelp on it. Use the Seahorse Lasso while swimming just about the red kelp to toss the rope in. You will either capture a seahorse or a shark, which will attack you. Keep doing this until you capture 5 seahorses. You can do this at any of the pillars up here.
4. Kill 4 Spinescale Hammerheads, 4 Seabrush Terrapins and 4 Scourgut Remora and use the Oil Extrusion Pump on their corpses to complete Environmental Awareness .
Return to Tenebrous Cavern.
5. Turn in Bio-Fuel to Fiasco Sizzlegrin.
Accept the followup, The Perfect Fuel.
6. Go to the table in the middle of the camp and click on it to begin mixing. You will need to select 5 samples of the different types of oil you collected. The combination that finally worked for me was 2x Remora Oil and 3x Hammerhead Oil, but I am not sure if there is a “correct” combination that will work every time. Just mix 5 samples together and take whatever you get to Fiasco Sizzlegrin. If you don’t get the quest complete message, just try again following Hexascrub’s suggestions until you complete the quest.
Turn in The Perfect Fuel once you are finished.
7. Turn in When in Vashj’ir… to Captain “Jewels” Verne .
Get the quests he offers you, Orako
8. Go to (?,?) and swim as far down as you can at those coordinates to find Orako. Turn in Orako.
Accept ”Glow-Juice”.
10. Kill Pyreshell Crabs and Luxscale Groupers, which can be found anywhere in Coldlight Chasm, until you have 6 Coldlight Phosphora.
Return to Orako when you are finished.
11. Turn in ”Glow-Juice”. Accept the two followups, Here Fishie Fishie and Die Fishman Die.
12. Use the Fish Hat to put a small glowing orb on your head. Swim all through the coral reefs in the Chasm until you collect 30 Coldlight Nibblers.
While doing this, kill 4 Coldlight Oracles and 4 Coldlight Huntersa.
13. When you are finished, return to Orako and
turn in both quests.
14. Accept Orako’s Report.
15. Swim back to Tenebrous Cavern.
16. Turn in One Last Favor to Captain Glovaal
18. Several new quests should have opened up. From Fiasco Sizzlegrin get Those Aren’t Masks.
19. Right next to him, from Sergeant Gertrude get Sira’kess Slaying and A Standard Day for Azrajar.
20. Finally, get Treasure Reclamation from Bloodguard Toldrek.
21. Swim out of Tenebrous Cavern and head Northwest to about (?,?). Pick up 6 Deepfin Plunder by opening the chests in this area.
22. Once you have all those, swim around the ridge you are on killing Merciless Ones. They will either be accompanying naga or carrying a gilblin. Any naga you kill will also count toward Sira’kess Slaying but the ones with the gilblin are less dangerous.
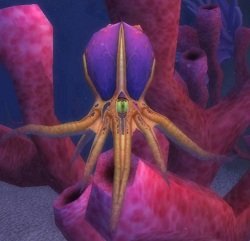
23. Swim to Sira’kess Front. Kill naga until you complete Sira’kess Slaying.
24. Go to (?,?) to find Fathom-Lord Azrajar. Kill him and use the Alliance Standard on his corpse to complete A Standard Day for Azrajar.
25. Swim back to Tenebrous Cavern. Turn in all your quests when you arrive.
26. Accept Put It On from Fiasco Sizzlegrin. Watch the vision then turn in the quest.
Accept the followup, Promontory Point.
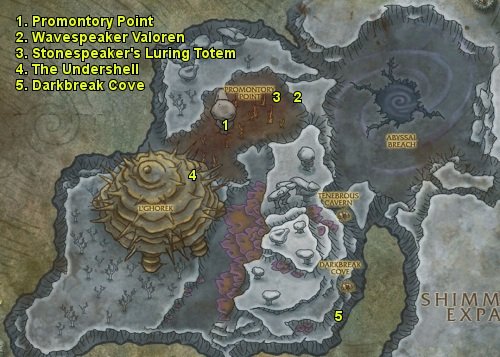
27. Leave Tenebrous Cavern and swim to Promontory Point.
1. Turn in Promontory Point to Legionnaire Nazgrim. Accept The Wavespeaker and Clearing the Corrupted
2. Accept Fireplume Shrooms from Wavespeaker Tulra.
3. Finally, from our old friend Erunak Stonespeaker, accept Into the Totem.
4. Swim in to Fireplume Trench directly below you. You need to do several things down here.
5. Kill any wildlife you find until you complete Clearing the Corrupted.
6. Collect 5 Fireplume Mushrooms.
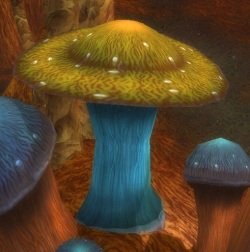
7. Kill 5 Corrupting Faceless. Make sure to drop Erunak’s Confinement Totem next to each one before they die to get credit.
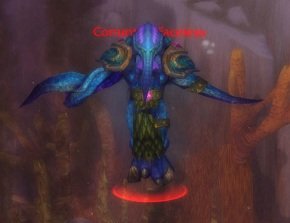
8. Swim to (?,?) where you will find Wavespeaker Tulra.
Accept Free Wil’hai.
9. Swim to one of the Tentacle Horrors and use Valoren’s SHrinkage Totem near it. It will shrink into a Shrunken Tentacle, which you need to kill. Do this for all three tentacles to complete the quest.
10. Return to Wavespeaker Tulra and turn in Free Wil’hai.
11. Return to Promontory Point and turn in all your quests.
12. Accept …It Will Come from Erunak Stonespeaker.
13. Swim to the Stonespeaker’s Luring Totem.(47, 28) Use it to summon Ick’thys the Unfathomable. Kill him and loot his brain to complete …It Will Come. During the fight, he will summon a shadow-copy of you, but you should be able to ignore it and just burn him down.
Return to Promontory Point.
14. Turn in …It Will Come to Erunak. Accept the followup, Unplug L’ghorek.
15. From Legionnaire Nazgrim, accept Fiends from the Netherworld.
16. Swim down, directly below L’ghorek’s head, to find the entrance to The Undershell. While in here, kill any Nether Fiends you see until you complete Fiends from the Netherworld.
17. Find and kill Ur’Goz at (37,47)
18. Kill Sku’Bu at (34.6,54).
19. Finally, kill Neph’Lahim at (29.6,53), near the back of the cave.
20. Make sure you have finished killing 8 Nether Fiends for Fiends from the Netherworld as you head back out of the cave.
Return to Promontory Point.
21. Turn in Fiends from the Netherworld to Legionnaire Nazgrim and Unplug L’ghorek to Erunak Stonespeaker.
Accept the followup, Communing with the Ancient.
22. Enter L’ghorek the same way you entered Nespirah.(41,47.5) The layout inside is the same.
Go to the Brain Room inside L’ghorek. Speak to the brain to turn in Communing with the Ancient. (38.5,45.5)
23. Accept both quests he offers you, Runestones of Binding and Ascend No More. Go out into the main chamber.
24. Avoid the center of the room, as it is guarded by elites. Run along the outside wall of the main chamber, to the ridge opposite the Brain Room.
25. Kill any Twilight Candidates you see until you get 7 Runestones of Binding. Continue to the next step while doing this.
26. You will come across devices in the center of the runed circles. There are the Ancient Conduits you need to destroy for Ascend No More. You need to break 5 to complete the quest. Continue to the next step while doing this.
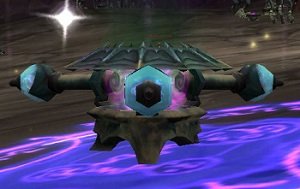
27. One of the Twilight Candidates you killed should have dropped a Twilight Key. Use it to begin the quest Prisoners
28. Continue killing Twilight Candidates, destroying the Ancient Conduits, and freeing Horde Prisoners until you complete all three quests. Click on the Quest Complete box to turn in Prisoners when you are done with the quest.
Return to the Brain Room.
29. Turn in both quests and accept the followup, Twilight Extermination.
30. Head to the temple at the center of the main chamber. Everybody will ignore you, so don’t panic. Go up to one of the Ascendants of the Deep and use the Attuned Runestone of Binding on it. You will posses the Ascendant.
Go fly through the groups around the temple, using the abilities on your vehicle bar to kill everything in sight. The first ability is your damage dealing ability. The second one will pull in everything around you. The third will heal you and increase your damage for a short time.
If your Ascendant is killed, everything will just go back to ignoring you, so just get another one.
31. Once you have caused enough damage, you will get a quest complete notification box. Click it to turn in Twilight Extermination.
Take the followup, All that Rises
32. The entrances to the temple are on the North and South sides. Inside you will find Hallazeal the Ascended. To kill him, keep him in front of you and spam the first ability on your bar. Ability 3 will still heal you. Ability 2 knocks enemies back now.
Once he is dead, return to the Brain Room.
33. Accept Back to the Tenebrous Cavern.
Leave L’ghorek and return to Tenebrous Cavern
34. Turn in Back to the Tenebrous Cavern to Erunak Stonespeaker.
Accept the followup, Defending the Rift.
Speak to Erunak again and tell him you are ready to enter the battle.
The event that follows is currently non-functional. As I understand it, this quests marks the end of the zone. I am going to submit this now, and I will come back to finalize the guide once the quest is fixed. Most likely on the pass-through to clean up the guides before Cataclysm launches.
This is the end of my leveling guide for Vashj’ir. At this point, you can continue into Deepholm. Or you can go to the other 80-82 zone, Mt Hyjal, if you have not already completed it.
I hope this guide was helpful to you, and that you enjoyed reading it. Feel free to leave any feedback in the comments below.


 by Arixan

Update?Hiya.Still a very good guide but would benefit from an update. Several things that were in the beta aren’t in the live game or were changed significantly, some quests have been added since this guide was done, there are still no coordinates etc. I also noticed that there were at least two occasions where you used the Alliance version of something instead of the Horde version eg displaying a picture of an Alliance Lookout instead of a Horde Lookout for the quest, “Not entirely unprepared.” and “…use the Alliance Standard on his corpse to complete A Standard Day for Azrajar.” I know they’re minor points but I’m pedantic!Anyway, thanks for the effort you put in to make this. Like I said before, it’s very good as are all the guides on WoWPro.Cheers =)
Curious DistractionJust letting you know; Blizzard has removed the quest Curious Distraction from the game.
Lady La-La’s NecklaceHi there. I’m up to the point where you kill Gilblin Collectors for Lady La-La’s Necklace. I’ve been here for about an hour farming for it without success. Might want to mention how long this can take in the guide to alert speed-levellers.
“The Wavespeaker” is not on live serversIt seems The Wavespeaker is not on live when you first arrive at promentaory point. I’ll update if it’s a followon quest.
Orako in addon wrong?edit: Orako appears to be in the wrong order on the add-on – asks you to pick it up before completing The Perfect Fuel
CoordinatesI don’t know about the rest, but I really liked how a lot more coordinates were provided in Jame’s previous versions which I used for WOTLK. In Arixan’s guide, there is barely any coordinates provided. I don’t know why we need TomTom in the first place, I end up having to hit ‘m’ a lot to figure out where things are using Blizzard’s in-game quest helper.
It seems “When inIt seems “When in Vashj’ir…” does not exist on live servers.
Great Guides!I just wanted to say how great your guides are. You did exceptional work and that plus Jiyambi’s recorder are making the addon work insanely easy!
Currently testing this outCurrently testing this out and recording progress into the addon.
Kelp Forest section, Step 16On step 16 in the Kelp Forest section you tell us “Once you have gathered everything for ‘To Arms!’… I think that you meant to say the ‘Girding Our Loins’ quest!
Great guide, thanks!!