Introduction/Notes
This guide will cover the Alliance quests in Mt Hyjal. I will cover 100% of the quests in the zone. Please note that this is based on a play through of the BETA version of the zone. Things can and probably will change. I will do my best to maintain the accuracy of the quests and objectives until finalized in the live version.
Everything in this guide can be done solo unless I specifically state otherwise. All of the level 80+ zones in Cataclysm make very heavy use of phasing as you progress through the zone. Be aware of this if you are trying to get a group for anything, as they may not be in the same phase as you are.
You will need to be able to use a flying mount in a couple places in this zone. You have been warned.
I will add coordinates to the guide once Blizzard allows for the use of addons in the beta realms.
I highly suggest you make use to the built-in quest tracking on the world map. I will describe as best I can where the NPCs and quest objectives are, but the objective tracking on the in game map will show you precisely where to go in most cases.
Please post and feedback, errors, or suggestions as comments.
Color Code
- Quests
- Items
- Locations
- Quest objectives to kill
- NPCs
- Coordinates
Table of Contents
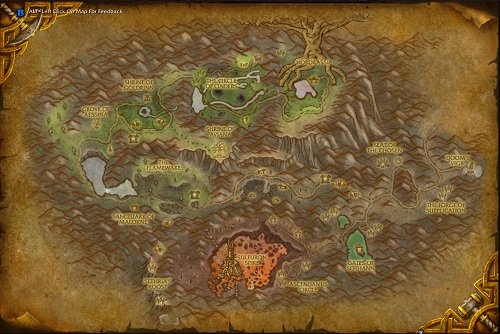
- Getting to Mt Hyjal
- Nordrassil – The World Tree
- The Verdant Thicket
- Shrine of Goldrinn
- Shrine of Aviana
- Grove of Aessina
- Sanctuary of Malorne
- The Scorched Plain
- Darkwhisper Gorge
- The Throne of Flame
Getting to Mt Hyjal
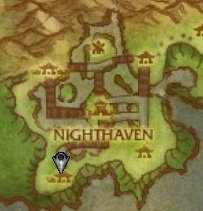
1. Find the Hero’s Call Board. Click on it and take the quest Hero’s Call: Mount Hyjal.
2. Find Cenarion Emissary Jademoon at the garden in Stormwind Keep. Speak to her to be teleported to Moonglade.
3. Speak to Emissary Windsong. Turn in Hero’s Call: Mount Hyjal and get the quest As Hyjal Burns.
4. Go over to Aronus, the green dragon hovering right next to where you are at and hop on. You will go through a scripted flyby of Mt Hyjal, and land under the World Tree.
Nordrassil – The World Tree
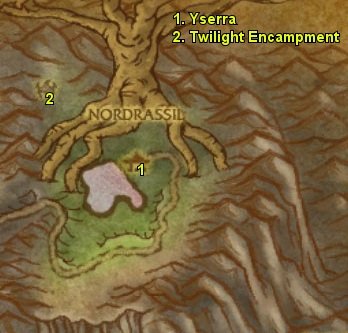
1. Enter the building in front of you and speak to Ysera to turn in As Hyjal Burns. Accept Protect the World Tree.
2. Exit the building. Directly in front of you, accept The Earth Rises from Anren Shadowseeker. Also get Inciting the Elements from Tholo Whitehoof.
3. Head northeast up the road. Kill any Scalding Rock Elementls nearby. While doing that, collect 4 Juniper Berries from the small bushes in the area.

4. Find one of the Faerie Dragons in the same area as the elementals. Use one of the Juniper Berries you collected on the Faerie Dragon and it will lead you to a Twilight Inciter, who will attack you. Repeat this 3 more times to complete Inciting the Elements. Also continue to kill Scalding Rock Elementls until you complete The Earth Rises.
5. Return to Anren Shadowseeker and turn in The Earth Rises.
6. Turn in Inciting the Elements at Tholo Whitehoof right next to you. Accept the follow up Flames From Above. You will receive Tholo’s Horn.
7. From the two NPCs, follow the road west to Fayran Elthas. Get the Flight Point.
8. Go to the Twilight Encampment northwest of the flight point. Use Tholo’s Horn in the center of the encampment to complete Flames From Above.
Go back to Tholo Whitehoof and turn it in.
The Verdant Thicket
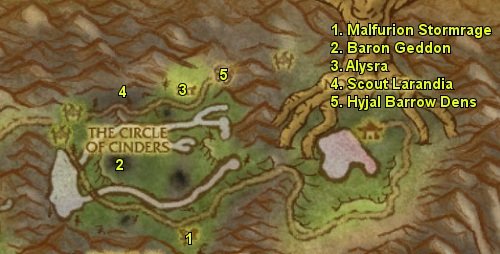
1. Get on your flying mount and fly southwest until you meet up with the road. If you prefer to use a ground mount, follow the road that heads east and curves around the Well of Eternity. Continue to follow this road to (?,?). Malfurion Stormrage and Windspeaker Tamila should be standing in a small shrine. Speak to Malfurion to turn in Protect the World Tree.
2. Get War on the Twilight’s Hammer from Malfurion Stormrage.
3. Get both quest and The Flameseer’s Staff from Windseeker Tamila .
4. Kill 4 Twilight Flamecallers and 10 Twilight Vanquishers for War on the Twilight’s Hammer in the area just north. While doing this, pick up 8 Charred Staff Fragments for The Flameseer’s Staff. Stay away from The Circle of Cinders for now.
5. Return to Malfurion Stormrage and turn in The Flameseer’s Staff and War on the Twilight’s Hammer. Accept the followup quest Flamebreaker.
6. Use the Flameseer’s Staff on the Blazebound Elementals in the charred areas around The Verdant Thicket. This will break up the elementals into 8-10 smaller elementals. Kill these Unbound Flame Spirits.
Repeat until Flamebreaker is complete. Return to Malfurion Stormrage to turn in the quest.
7. Accept The Return of Baron Geddon.
8. Go The Circle of Cinders, where you will find Baron Geddon. You need to use the Flameseer’s Staff on him. Every 10 seconds or so, he will begin to channel an AOE fire effect that will hurt you badly, forcing you to move away. When the fire dies down, run back in and use the staff again. Do this until The Return of Baron Geddon is complete.
As soon as the quest is complete, Baron Geddon will cast Living Bomb on you. After about 10 seconds, you will blow up, causing you to fly into the air (you will take some falling damage) and dealing damage to anyone around you. So get away from everyone until it goes off.
Mount up and return to Malfurion. Turn in The Return of Baron Geddon.
9. From Windspeaker Tamila, accept Emerald Allies
10. Find Alysra at the Ruins of Lar’donir. Turn in Emerald Allies. Accept The Captured Scout.
11. Scout Larandia is located in a cage in the back of the Twilight Command Post. Speak to her to turn in The Captured Scout. Accept Twilight Captivity.
12. Find and kill a Twilight Overseer. They are the two-headed ogres inside the Twilight Command Post. Loot the key off of him to complete Twilight Captivity.
13. Return to Scout Larandia.
14. Turn in Twilight Captivity. Accept Return to Alysra
14. Do what the quest says and return to Alysra. Turn in Return to Alysra and accept A Prisoner of Interest.
15. Go to the Hyjal Barrow Dens northeast of the crater. Travel all the way to the bottom of the barrow dens, until you reach Captain Saynna Stormrunner. Turn in A Prisoner of Interest.
16. Once you accept the follow up, Through the Dream, you will be moved into a separate phase. Fight your way out of the barrow dens. You will get the quest complete message when you reach the top.
17. Alysra should be right in front of you. Turn in Through the Dream and accept Return to Nordrassil.
Mount up and fly back to Ysera in the building under the World Tree.
Shrine of Goldrinn
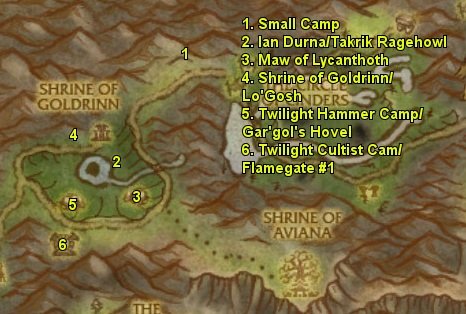
1. Turn in Return to Nordrassil to Ysera. Accept The Return of the Ancients.
2. Mount up and fly to the road on the far side of The Verdant Thicket. You will see a small camp up on a ridge to the right of the road. Turn in The Return of the Ancients to Oomla Whitehorn. Accept Harrying the Hunters.
3. In the same camp, accept both quests from Jadi Falaryn – End of the Supply Line and In the Rear With the Gear.
4. Along the road just below the camp, kill 6 Twilight Hunters and 4 Twilight Proveditors. The hunters are the trolls off to each side of the road. The providers are the ogres with slaves following them.
5. There are Twilight Slavedrivers walking with the proveditors. When you kill them, the slaves following them will drop the packs they are carrying. Loot these packs to get Twilight Supplies. Keep killing slavedrivers and picking up packs until you complete In the Rear With the Gear.
6. Return to the camp and turn in Harrying the Hunters, End of the Supply Line, and In the Rear With the Gear. Get the quest The Voice of Goldrinn.
7. Follow the road west until it branches. Take the fork to the right, down to a valley. If you are following the road down, continue straight, past the wolf statue, to get to Ian Duran. He is in a cage at the edge of the small pond. Turn in The Voice of Goldrinn and accept the follow up Goldrinn’s Ferocity.
8. Kill Lycanthoth Vandals and loot 6 Polluted Incense from their corpses.
9. Return to Ian Duran and turn in Goldrinn’s Ferocity. Accept the follow up Lycanthoth the Corruptor.
10. Go to the Maw of Lycanthoth in the southeast corner of the valley.
11. Use Lycanthoth’s Incense near the altar inside the cave. This will summon Lycanthoth. Kill him to complete Lycanthoth the Corruptor. The Spirit of Goldrinn will appear.
12. Turn in Lycanthoth the Corruptor. You will automatically hop on his back and ride around as he cleans out the shrine. When he is finished and you have hopped off, speak to him and accept the follow up The Shrine Reclaimed.
13. You’ll be in a new phase. Go to the shrine in the north area of the valley. Ian Duran has been released from his cage. Go to him and turn in The Shrine Reclaimed. Accept the quest Cleaning House.
14. In the same camp, from Rio Duran accept From the Mouth of Madness.
15. Find Royce Duskwhisper, who wanders around the camp, to get the quest The Eye of Twilight.
16. Gather 1 Bitterblossom from the plants around the edge of the pond.
17. Kill 8 Hovel Brutes for Cleaning House while completing the next steps.
18. The rest of the quests you just picked up are all done in the Twilight Hammer camp in the southwest area of the valley. Search around the base of the rock formations there to find a Stonebloom
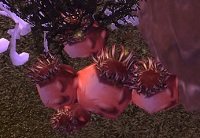
19. Go to the brazier pictured below. Collect a Darkflame Ember from it.
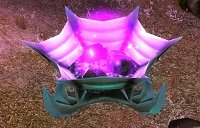
20. Click on the cauldron just south of the brazier to turn in From the Mouth of Madness. Accept the followup quest Free Your Mind, the Rest Follows.
21. Turn in The Eye of Twilight at the orb outside the cave entrance. Take the followup Mastering Puppets.
22. Enter the cave. As you go through the cave, talk to 8 of the Twilight Servitors and select the dialog option available to complete Free Your Mind, the Rest Follows.
23. Stay to the left from the entrance to reach Kristoff Manheim. He’ll be hanging from a meat hook in the back of the cave. Accept his quest, Gar’gol’s Gotta Go.
24. Continue through the cave, hugging the wall on your left, until you reach a pedestal with a book on it. Turn in Mastering Puppets. Note the large stone portal in front of you.
25. Accept the quest from the book, Elementary!. This quest requires you to activate the four orb floating near the pedestal in a particular order. The correct order is as follows.
Crucible of Fire
Crucible of Earth
Crucible of Air
Crucible of Water
Be prepared to fight as soon as you click on the Crucible of Water. A Twilight Hammer cultist named The Manipulator will come out of the portal and attack. Kill him, then turn in the quest at the podium. Accept the followup Return to Duskwhisper.You will get a very useful 10 minute buff that will cause all of the ogres in the hovel to no longer be hostile unless you attack them.
26. Continue hugging the left wall until you reach the center of the cave. You will see Gar’gol, a large blue skinned ogre, sitting on a small rise. Loot a key from the chest on the rise where he is sitting to complete Gar’gol’s Gotta Go. Because of the buff you received, you should not have to kill him.
27. Head back to Kristoff Manheim to turn in Gar’gol’s Gotta Go. Accept Get Me Outta Here! and escort Kristoff out of the cave.
28. Once you get the quest complete message, head back to the Shrine and turn in all of your quests.
29. From Ian Duran accept Sweeping the Shelf and Lightning in a Bottle.
30. Follow the road west out of the valley, to Lightning Ledge. Kill 8 Twilight Stormcallers and 5 Howling Riftdwellers for Sweeping the Shelf.
31. Loot a Charged Condenser Jar from the lightning rods scattered around the area.
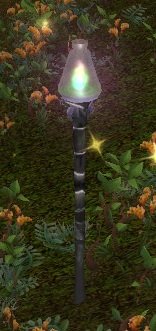
32. Use the Totem of Goldrinn to summon the wolf spirit. Turn in Lightning in a Bottle and accept Into the Maw!.
33. Finish killing everything Sweeping the Shelf.
34. Enter the portal in the center if the Twilight Cultists camp. You will be teleported to the Firelands Forgeworks.
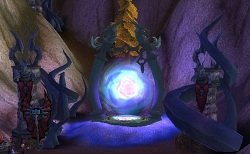
35. Turn in Into the Maw!.
36. Pick up Forged of Shadow and Flame,Crushing the Cores and Rage of the Wolf Ancient.
37. Break 10 Twilight Arms Crates while completing the next step.
38. Kill 12 Dark Iron Laborers and 8 Searing Guardians. Be sure to loot the Smoldering Cores from the Guardians you kill.
39. Find a Twilight Anvil, which is usually around the edges of the cavern, and use the Smoldering Cores while standing next to it. Repeat 8 times to complete Crushing the Cores.
40. Return to the NPCs at the front of the cavern to turn in Forged of Shadow and Flame, Crushing the Cores, and Rage of the Wolf Ancient.
41. Accept Cindermaul, the Portal Master from Jordan Olafson.
42. Head west back to the center of the cavern. From the center, follow the path down to the right. In the first cavern to the left, you will find Cindermaul. Kill him, then loot the chest he leaves behind to complete Cindermaul, the Portal Master.
43. Go back to the front and turn in the quest. Pick up Forgemaster Pyrendius.
44. Forgemaster Pyrendius is a level 80 elite. He has 154k health, so don’t try to fight him directly. He is standing in a circle of runes. To kill him, drag Pyrendius to one of those runes, click on it to activate the rune, then position Pyrendius so that he is standing on the rune. Repeat that, moving from rune to rune, until he dies.
45. Return to Jordan Olafson and turn in Forgemaster Pyrendius. Get Return from the Firelands.
46. Enter the portal behind you. This will return you the Shrine of Goldrinn. Fly back to the camp, to Ian Duran, and turn in both of the quests you have, Return from the Firelands and Sweeping the Shelf.
47. Yserra will appear in front of you. Accept in Aviana’s Legacy from her. Also accept The Fires of Mt. Hyjal from Rio Duran.
Shrine of Aviana
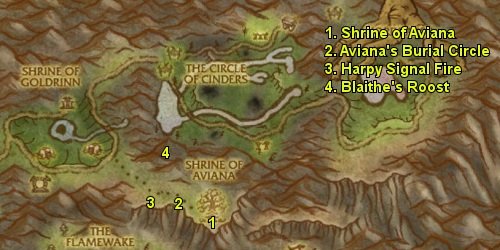
1. Mount up and fly southwest to the Shrine of Aviana.
2. Stop at Dinorae Swiftfeather to get the flight point.
3. Enter the first floor of the building at the base of the tree. Head all the way to the back of the shrine to find Choluna.
4. Turn in Wings Over Mount Hyjal and accept An Offering for Aviana.
5. On the way out, speak with Thisalee Crow, who is sitting on a brazier by the enterance. Pick up both her quests, The Wormwing Problem and Scrambling for Eggs.
6. Go to the small circle of stones just outside the shrine. Use the Sacred Nectar while standing near the basin in the center of the stone circle. The Spirit of Aviana will appear. Turn in An Offering for Aviana and accept A Plea From Beyond.
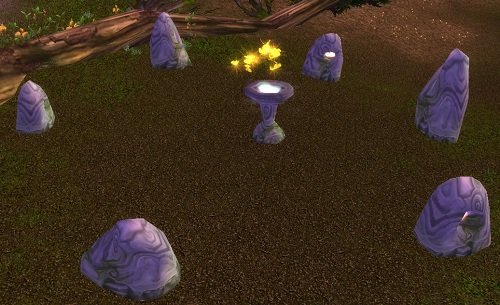
7. While completing the next step, collect 8 Stolen Hyjal Eggs. They can be found around the base of the trees in the area west of the shrine.
8. Kill Wormwing Screechers and Wonrmwing Swifttalons until you complete The Wormwing Problem.
9. Return to the Shrine. At Thisalee Crow turn in The Wormwing Problem and Scrambling for Eggs. Accept A Bird in Hand.
10. In the back of the shrine, turn in A Plea From Beyond to Choluna. Accept A Prayer and a Wing.
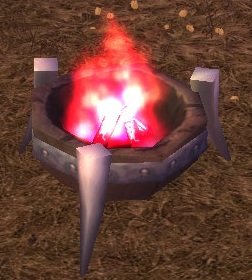
11. Find the signal fire just west of the shrine. Use it to summon Marion Wormwing. Fight her until Thisalee Crow sneaks up behind her and captures her.
12. Once she is captured, talk to Marion Wormwing. Go through the dialogue options until you get the quest complete message for A Bird in Hand. The difference choices have no effect that I have found.
13. Get on your flying mount and fly up to the top of the ridge to the north. You will see several nests. Land in one and use the Enormous Bird Call to summon Blaithe. Kill him and loot the Ancient Feather from his corpse.
14. Return to the Shrine. Turn in A Bird in Hand to Thisalee Crow.
15. Go back to Choluna and turn in A Prayer and a Wing.
16. Go up the ramp at the front of the Shrine, and follow it up to the third tier. Pick up Fact-Finding Mission from Skylord Omnuron. We will be doing this quest later.
17. Mount up and head west, past the Shrine of Goldrinn. Follow the road until you reach the Grove of Aessina.
Grove of Aessina
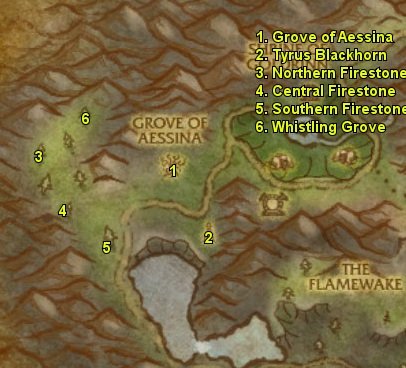
1. Inside the Grove, get the quests Save the Wee Animals from Mylune and If You’re Not Against Us… from Matoclaw.
2. Get the flight path from Elizil Wintermoth.
3. Leave the shrine and go slightly east up the road to a small tower. Find Tyrus Blackhorn at the base of the tower.
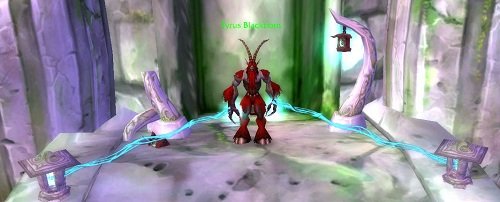
4. Speak to him, and go through the different conversation options to complete If You’re Not Against Us….
5. Turn in the quest to Blackhorn and accept Seeds of Their Demise.
6. Kill Wailing Weeds in the area directly surrounding the tower until you get 8 Bileberry.
7. Return to Blackhorn and turn in Seeds of Their Demise. Accept A New Master.
8. Follow the road west to Laina Nightsky. Turn in The Fires of Mt. Hyjal. Accept Fighting Fire With…Anything and Disrupting the Rituals.
9. While completing the next steps, collect Panicked Bunnies and Terrified Squirrels until you complete Save the Wee Animals. Also, kill any Raging Firestorms and Twilight Inferno Lords you see.
10. Use the Bottled Bileberry Brew on one of the Twilight Inferno Lords you have killed to complete A New Master. Accept the follow up The Name Never Spoken.
11. Find the three firestones.

The Northern Firestone is located at (?,?)
The Central Firestone is located at (?,?)
The Southern Firestone is located at (?,?)
12. Finish killing Raging Firestorms and Twilight Inferno Lords until you have completed Fighting Fire With…Anything and Disrupting the Rituals. Also finish catching animals for Save the Wee Animals.
13. Return to Laina Nightsky and turn in Fighting Fire With…Anything and Disrupting the Rituals.
14. Inside the Grove, turn in Save the Wee Animals at Mylune. Accept Oh, Deer!.
15. Go back to Blackhorn’s tower. Speak to Tyrus Blackhorn to turn in The Name Never Spoken.
16. Accept Black Heart of Flame.
17. Head back to the burning forest.
18. Clear an area of enemies, then use the Charred Branch to summon Thol’embar. Kill him and loot his heart to complete Black Heart of Flame.
19. Find 3 Injured Fawns. When you click on them, they will begin to follow you. Once you have 3 following you, return to Mylune to complete Oh, Deer!. Turn it in.
20. Return to Tyrus Blackhorn and turn in Black Heart of Flame.
21. Go to Laina Nightsky, just outside the Grove. Get the quest Last Stand at Whistling Grove.
22. Follow the ridge of mountains on your right, into the burning forest. They will curve around and lead you to the Whistling Grove. On the map above, it is the green area north of the burning forest.
23. Speak to Keeper Taldros to turn in Last Stand at Whistling Grove. Accept The Bears Up There.
24. Find one of the trees nearby that has small ladders around its base. Click on one of the ladders to climb into the tree. In the tree, Click on one of the bear cubs you are near to grab it. Then use the vehicle controls on your action bar to climb to the top of the tree.
Once you are at the top of the tree, you will get a new control: Chuck-a-Bear. Aim for the trampoline in front of Keeper Taldros and toss the bear cub onto it. Then climb to a lower part of the tree to get another bear cub. Repeat 6 times to complete The Bears Up There.
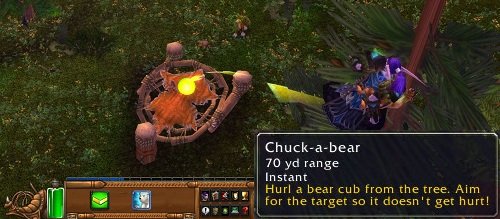
25. Turn in the quest to Keeper Taldros. Accept Smashing Through Ashes.
26. Head south through the burning forest until you meet up with the road. Follow the road south, making sure to kill 8 Charbringers along the way. Continue following the road until you reach the Sanctuary of Malorne.
Sanctuary of Malorne
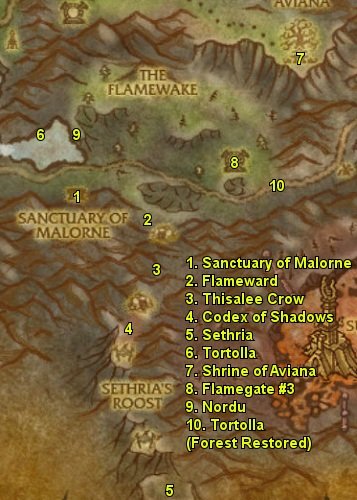
1. At Arch Druid Hamuul Runetotem turn in Smashing Through Ashes. Accept Durable Seeds. Also accept Fresh Bait.
2. Get Firebreak from Rayne Feathersongwho is standing right behind Hamuul.
As you complete the next steps, watch out for Nemesis, a level 80 Elite giant turtle who patrols all over The Flamewake.
3. Go north into The Flamewake, killing Core Hounds along the way until you have 4 Core Houndr Entrails for Fresh Bait.
4. Look for small piles of dirt on the ground. Click on them to get a Hyjal Seedling. Continue to do this until you have 10 seedlings.
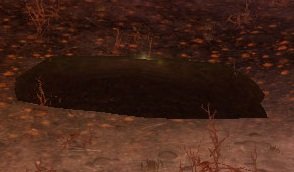
5. Kill 10 Lava Surgers for Firebreak.
6. Return to the Sanctuary of Malorne and turn in all your quests. Accept Hell’s Shells from Hamuul and Prepping the Soil from Rayne.
7. Get on your flying mount and fly around The Flamewake until you find Nemesis. Land a safe distance away and place the Heap of Core Hound Innards on the ground so that Nemesis walks near them. Once Nemesis gets in range of the Innards, he will begin to eat them, allowing you to run up to him and collect the shell fragment by clicking on him. As soon as you have the fragment, quickly get on your mount to get away before he attacks you..
8. Head to a small area in the south part of The Flamewake, almost directly east of the Sanctuary of Malorne. You will be in front of a cave entrance. Find the Flameward at (?,?). Clear the area of any enemies that might attack you then right-click on the Flameward to activate it. Defend the Flameward from anything that comes out to attack it. After about a minute, the Flameward will be fully activated, which will kill any remaining enemies around it.
9. Enter the cave south of the Flameward. Go through the tunnel to find Thisalee Crow. Turn in Fact-Finding Mission. Accept Sethria’s Brood and A Gap in Their Armor.
10. Follow the path south kill 12 of the Twilight Dragonkin. Avoid the Twilight Juggernauts for now.
While doing that, collect 8 8 Twilight Armor Plates.
11. In the center of the camp, you will find a pedestal with a book on it. Click on the book and accept the quest The Codex of Shadows.
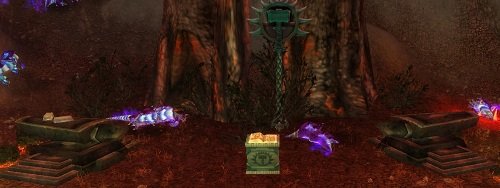
12. Finish killing dragonkin for Sethria’s Brood and collecting armor plates for and A Gap in Their Armor.
13. Return to Thisalee Crow and turn in Sthria’s Brood, The Codex of Shadows and and A Gap in Their Armor.
14. Accept Egg Hunt and Disassembly.
15. Back into the camp. Find a Twilight Juggernaut. Use Thisalee’s Shiv on him to break his armor, then kill him. You can use the Shiv multiple times to further decrease his armor. Repeat this two more times.
16. Find one of the Shadow Cloak Generators.
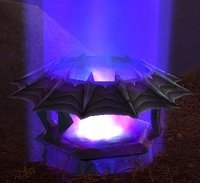
Click on it to deactivate it. Keep doing this until you find Aviana’s egg. Once you find the egg, you must defend it until the druids come to collect it. So just kill anything that comes after the egg until you get the quest complete message for Egg Hunt.
17. Return to Thisalee and turn in Egg Hunt and Disassembly. Accept Sethria’s Demise.
18. Get on your flying mount and fly far to the south (?,?), where you will find Sethria. Attack her until she changes into her dragon form. When she does, use Thisalee’s Signal Rocket to summon the Druids of the Talon to help you defeat her. She will occasionally place a shadow fissure on the ground around. Move out of it as soon as you see it to avoid massive damage.
Once she has died, return to Thisalee Crow to turn in Sethria’s Demise.
19. Accept Return to the Shrine.
20. Fly back to the Shrine of Malorne and turn in Prepping the Soil and Hell’s Shells. Accept Tortolla Speaks.
21. Fly to Torolla, who is chained on the far side of the lake at (?,?). Turn in Tortolla Speaks.
22. Accept Breaking the Bonds and Children of Tortolla.
23. Jump into the lake and swim down. Kill the Deep Corruptors to rescue the eggs they are near. Do this 6 times to complete Children of Tortolla.
24. Go back to Tortolla. Use the giant rod to your left to break the chain holding Tortola and summon a Twilight Dominator. Kill him, then repeat on the other rod to the right to complete Breaking the Bonds.
25. Speak to Tortolla and turn in both quests.
26. Accept An Ancient Awakens. Fly back to the Sanctuary of Malorne.
27. Turn in An Ancient Awakens.
28. Fly back to the Shrine of Aviana. Find Choluna in the back. Turn in Return to the Shrine. Accept An Ancient Reborn.
29. Go up the ramp to your right, into a small room where you will find Aviana’s Egg. Use the Herald’s Incense near the egg to resurrect Aviana.
30. Turn in An Ancient Reborn to Aviana. Accept The Hatchery Must Burn.
31. Ysera will appear next to Aviana. Accept Accept The Last Living Lorekeeper.
32. Fly back down into The Flamewake. Enter the large portal in the center to be teleported to the Firelands Hatchery.
33. Turn in The Hatchery Must Burn to Farden Talonshrike. Accept Flight in the Firelands.
34. Loot a Twilight Firelance from one of the weapon ranks behind Farden. Equip it and jump on one of the Aviana’s Guardians nearby.
Flight does not work the normal way on these mounts. You must use the Flap ability to make them move forward AND stay in the air. You will move forward and gain altitude the more you use the ability.
Fly to one of the flags on any the ledges in the cavern, then fly back to complete the quest.
35. Turn in Flight in the Firelands. Accept Wave One.
36. Using the same controls, fly into the center of the cavern. You will see many Twilight Buzzards flying around. “Kill” them by running onto the buzzards with your mount. Do this 10 times to complete Wave One.
37. Fly back up to the ledge with Farden Talonshrike. Turn in the quest and accept the follow up Wave Two.
This quest is exactly the same as the last one, except now there are flaming boulders falling from the sky that you must dodge. If your mount gets killed, there are replacement mounts at the bottom of the cavern.
Once you have killed 10 Twilight Lancers, fly back up to Farden’s ledge.
39. Turn in Wave Two. Accept Egg Wave.
This quest is much easier. Still using the same controls, fly over to the ledges around the room and run over the eggs that are on them. Return to Farden once you have smashed 40 eggs.
40. Turn in Egg Wave. Accept Return to Aviana. Make sure to re-equip your weapon. Use the portal across the bride to the east to teleport back to The Flamewake.
41. Find Nordu on a rise just north of the Sanctuary of Malorne. Turn in The Last Living Lorekeeper.
42. Accept Firefight.
43. Kill 5 Firey Tormentors nearby. Return to Nordu when you are finished.
44. Turn in Firefight. Accept Aessina’s Miracle.
45. Return to Aviana at the Shrine of Aviana.
46. Turn in Return to Aviana.
47. Fly back to the Grove of Aessina. Speak to Arch Druid Hamuul to turn in Aessina’s Miracle.
48. When the event finishes, accept Tortolla’s Revenge from Arch Druid Hamuul.
49. Follow the road through the newly restored forest until you reach Tortolla. Turn in Tortolla’s Revenge.
The Scorched Plain
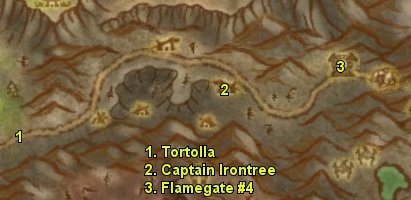
1. Accept The Hammer and the Key from Tortolla. From Niden, a nightelf sitting on the ground next to Tortolla, accept Breakthrough and Lost Wardens.
2. Follow the road east into The Scorched Plain.
3. While completing the next steps, find and speak to 8 Lost Wardens to complete Lost Wardens.
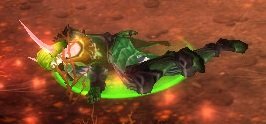
4. Kill 10 Twilight Scorchlords
5.Continue to follow the road east until you reach a building with nightelves fighting around it. Go inside to find Captain Irontree.
6. Turn in Lost Wardens and Breakthrough. Accept Pressing the Advantage.
7. Speak to Logram up the ramp behind Captain Irontree. Accept Hyjal Recycling Program.
8. While completing the next step, collect 15 Warden’s Arrows.
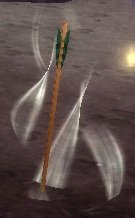
9. Kill 4 Twilight Field Captains. Be sure to loot a Glyph of Opening off one of them to complete The Hammer and the Key.
10. Return to Tortolla. Turn in The Hammer and the Key. Accept The Third Flamegate (even though it is the fourth one we are going in).
11. Fly back to Captain Irontree. Turn in Pressing the Advantage. At Logram, turn in Hyjal Recycling Program.
12. Go farther down the road, to the east, until you reach another flamegate. Enter it to be teleported to The Crucible of Flame.
13. Speak to Garunda Mountainpeak. Turn in The Third Flamegate. Accept The Time for Mercy has Passed and The Strength of Tortolla.
14. Make your way through the cavern, killing Molten Tormentors and Shadowflame Masters along the way, until you find a Nemesis Crystal. Move the Cild of Tortolla following you close to the crystal and he will automatically examine it.
Make sure you have killed 10 Molten Tormentors and 4 Shadowflame Masters before moving to the next step.
15. Return to the front of the cavern, and turn in The Time for Mercy has Passed and The Strength of Tortolla. Accept Finish Nemesis.
16. Time to fight the giant turtle we have been dodging all this time. Go all the way to the end of the cave, where you will find Nemesis. Attack him until you get the message “Nemesis is about to erupt!” When you see that, use the Totem of Tortolla to place a shield around yourself, protecting you from damage but also preventing any movement or attacks by you. Nemesis will erupt in flames, damaging himself and everything around him. Repeat this sequence of attacking and shielding until Nemesis is dead.
17. Return to Garunda Mountainpeak at the front of the cavern to turn in Finish Nemesis.
18. Accept Tortolla’s Triumph. Use the portal nearby to teleport back to The Scorched Plain.
19. Follow the road, heading west, all the way back to Tortolla.
20. Turn in Tortolla’s Triumph. Accept The Ancients are With Us.
21. Return to Ysera in the building under The World Tree.
22. Turn in The Ancients are With Us. Accept Commander Jarod Shadowsong.
Darkwhisper Gorge
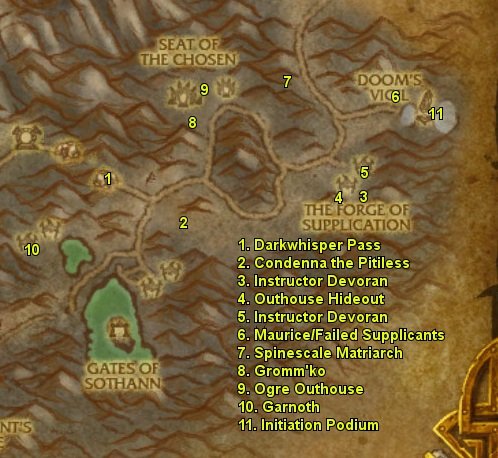
1. Fly south and down from The World Tree, until you are back at the third flamegate. From there, follow the road east to a tunnel. At the end of the tunnel you will find Elementalist Ortell.
2. Turn in Jarod Shadowsong and accept Signed in Blood.
3. Follow the road out of the cave until you reach a small group of Twilight Recruits. Speak to one of the recruits to get him to follow you.
4. Lead him out of sight of the rest of the group and use the Blackjack on the recruit. This will kill him. Loot the Twilight Recruitment Papers.
5. Return to Elementalist Ortell and turn in Signed in Blood. Accept Your New Identity. Congratulations, you are now a member of the Twilight’s Hammer cult!
6. Head east down the road until it splits off to the north and south. There will be a small path continuing east. Follow it to a tent where you will find Condenna the Pitiless.
7. Speak to her to turn in Your New Identity. Accept Trial by Fire and In Bloom.
8. Right next to Conenna, speak to Instructor Cargall to get the quest Waste of Flesh.
During the next steps, watch out for a giant core hound named Smolderos the Carbonizer, a level 82 Elite that patrols through the area.
9. Enter the Twilight Gauntlet just to the east. In this area, you need to kill 8 Twilight Instructors, which are the fire elementals wandering around.
10. While doing this, you also need to collect 5 Flame Blossoms
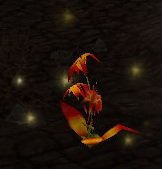
11. Find an Immolated Supplicant that are running around covered in fire. Use the Frostgale Crystal on them to put out the flames.
12. Once all three quests are complete, return to Condeena the Pitiless and Instructor Cargall. Turn in all of the quests.
13. Accept the quest Twilight Training.
14. Head east to The Forge of Supplication. Find Instructor Mylva at the back of the camp.
15. Turn in Twilight Training. Accept Physical Training: Forced Labor.
16. Closer to the front of the camp, slightly to the east, find Instructor Devoran. Speak to him to accept the quest Walking the Dog.
17. Finally, go to the Outhouse Hideout on the west side of the camp. Elementalist Ortell is hiding inside. Click on the outhouse to get the quest Gather the Intelligence.
18. Search the camp until you find the Twilight Communique. It can be just about anywhere in the camp so just keep looking around until you find it. Try to grab it when none of the Twilight Guards are close by. If they see you take the communiqué they will attack.
19. Leave the camp. Head northeast, toward the other camp, Doom’s Vigil. On the way, kill Spinescale Basilisks until you have 5 Charred Basilisk Meat and use the Twilight Pick on 5 Darkwhisper Lodestones.
20. Find the Hyjal Battleplans somewhere in the Doom’s Vigil camp. Again, try to make sure no Twilight Guards are nearby, otherwise you will be attacked.
21. Once you have found the battleplans, head back toward The Forge of Supplication. Be sure to finish getting the 5 Charred Basilisk Meat and breaking 5 lodestones on the way, if you have not already done so.
22. Once back in the camp, use the Firey Leash to summon the Spawn of Smolderos. Feed him the 5 Charred Basilisk Meat you collected to complete Walking the Dog.
23. Go back to Instructor Devoran and turn in Walking the Dog. Accept A Champion’s Collar.
24. Next, go back to the Outhouse Hideout and turn in Gather the Intelligence. Accept Seeds of Discord.
25. Finally, go back to Instructor Mylva to turn in Physical Training: Forced Labor.
Before you accept the follow up, let me explain what you will have to do. As soon as you accept the quest, Mylva will summon a Blazing Trainer. You need to run away from the trainer for 1 minute without leaving the camp. He does not move very fast, but if he catches you he can hit moderately hard. So be ready to start running when you accept the quest.
26. Accept Agility Training: Run Like Hell!. When you have completed the quest, return to Instructor Mylva and turn it in.
27. Accept Mental Training: Speaking the Truth to Power.
28. Use the Orb of Ascension. You will be asked 10 yes/no questions. The questions are simple and the answers are VERY obvious. Your action bar will be replaced with 3 abilities: Yes, No, and Dismiss Orb of Ascension. Use these to answer the questions within three seconds. If you answer a question wrong or fail to answer in time, you will take damage. Dismiss the Orb once you get the quest completed message.
29. Turn in Mental Training: Speaking the Truth to Power. Accept Spiritual Training: Mercy is for the Weak.
30. Go back to Doom’s Vigil. To your left as you enter the camp, you will see a group of Failed Supplicants. At the back of the group, talk to Maurice and accept the quest The Defector.
31. Kill 5 Failed Supplicants to complete Spiritual Training: Mercy is for the Weak.
32. Leave the camp and follow the road when it turns north. You will find the Spinescale Matriarch at (?,?). Kill her and loot the Spiked Basilisk Hide for A Champion’s Collar.
33. Return to Instructor Devoran at The Forge of Supplication. Turn in A Champion’s Collar. Accept Grudge Match.
34. Leave the camp and go to the Seat of the Chosen. Go to the first building on your left as you enter the camp.
35. Speak to Gromm’ko to challenge him to a match. Once your core hound pup kills his raptor, Gromm’ko will attack you. Kill him to complete Grudge Match.
36. Go to the Ogre Outhouse on the right side of the large building. Use the Ogre Disguise near the outhouse to transform into an ogre. Enter the large building.
37. Speak to Karr’gonn to get him to leave the room. As soon as he is outside, kill High Cultist Azennios.
38. Head back to The Forge of Supplication. Turn in Grudge Match to Instructor Devoran.
39. At the Outhouse Hideout, turn in Seeds of Discord and The Defector.
40. Go to Instructor Mylva and turn in Spiritual Training: Mercy is for the Weak.
41. Accept The Greater of Two Evils and Twilight Territory.
42. Mount up and head east, past the Gates of Sothann, to about (?,?).
43. Kill 10 Horrorgurds while making your way back toward (?,?), where you will find Garnoth, Fist of the Legion
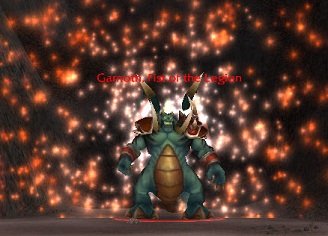
44. Use the Talisman of Flame Ascendancy and use the abilities you now have to kill Garnoth. Start off the fight by using Flame Shield to protect yourself, the use Ascendant Strike 3 times to attack Garnoth. Repeat this rotation until he is dead.
45. Finish killing Horrorgurds for Twilight Territory.
46. Return to the The Forge of Supplication. Speak to Instructor Mylva and turn in The Greater of Two Evils and Twilight Territory.
47. A new quest has opened up at the Outhouse Hideout behind you. Accept Speech Writing for Dummies.
48. Search around the roads leading to the Seat of the Chosen until you find Okrog. Kill him, then fly back to the Outhouse Hideout.
49. Turn in Speech Writing for Dummies and accept Head of the Class.
50. Turn in Head of the Class at Instructor Mylva. Accept Graduation Speech.
51. Fly over to Doom’s Vigil. You will find a podium all the way at the back of the camp. Click on it to start the event.
During this event, you will have to use 3 abilities depending on the crowd’s mood. These abilities are: Inspire, Incite, and Pander.
The members of the crowd will say different things depending on their mood. Wait until a random crowd member says something, then use the abilities as follows.
Use Inspire if the crowd says…
* Yea… I don’t know about this.
* I’m not quite convinced.
* *yawn*
* Meh.
Use Incite if the crowd says
* Kill!!!
* Kill them all!
* Blood!
* Raaahhh!!!!
* Death!
* Crush!
Use Pander if the crowd says
* It’s like… it’s like the void just touched my mind.
* The end is nigh! The end is a new beginning!
* Immalanath, yasoth nalarub!!!
* I hear the voices!
Once you have made the correct choice 10 times, the crowd will riot, allowing you to rescue Jarod Shadowsong. Speak to him to turn in Graduation Speech. Accept Twilight Riot.
The Throne of Flame
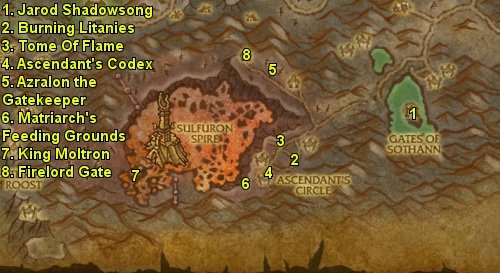
1. Mount up and fly past the Gates of Sothann, to the island in the middle of the lake. Speak to the green dragon Althera to get the flight point.
2. Speak to Commander Jarod Shadowsong to turn in Twilight Riot. Accept Slash and Burn.
3. Get on one of the Emerald Drakes nearby. Fly east back into Darkwhisper Gorge. Use the Acid Blast ability on any ground units you see until you have killed 40 Twilight’s Hammer units, and the Aerial Swipe ability on 5 of the Twilight Stormwakers, the twilight dragons flying around.
4. Fly back to the Gates of Sothann. Talk to Commander Jarod Shadowsong and turn in Slash and Burn.
5. Accept Might of the Firelord from Jarod Shadowsong and Secrets of the Flame from Cenarius.
6. Speak to the green dragon Althera to get the flight point.
7. Fly west to Ascendant’s Circle. Kill 4 Flame Ascendants and 5 Twilight Subjugators.
8. You should have looted a Pure Twilight Egg from one of the Twilight Subjugators you killed. If you do not have it yet, keep killing Twilight Subjugators until you get it. Click on it to accept the quest The Twilight Egg.
Until I can get coordinates for the three items, the best I can tell you is look all over the camp. They are not terribly hard to find. I’ll add the coodinates as soon as I can.
9. Go to (?,?) and get The Burning Litanies.
10. Go to (?,?) and get the Tome of Flame.
11. Go to (?,?) and get the Ascendant’s Codex.
12. Fly back to the Gates of Sothann.
13. Turn in Might of the Firelord at Jarod Shadowsong. Accept The Sanctum of the Prophets
14. Turn in Secrets of the Flame to Cenarius. Accept The Gatekeeper.
15. Turn in The Twilight Egg to Aronus. Accept Brood of Evil.
16. Fly back to Ascendant’s Circle. Kill a Young Twilight Drake and loot his skull for Brood of Evil.
17. Fly to the camp north of Ascendant’s Circle. Kill everything you need for The Sanctum of the Prophets.
18. Find Azralon the Gatekeeper in the northwest end of the camp. Make sure you are at full health/mana. Attack him and immediately use the Horn of Cenarius to summon Goldrinn and a group of druids to help you kill him.
19. Once he is dear, click the “Quest Complete†notification to turn in The Gatekeeper. Accept The Firelord.
20. Return to Aronus and turn in Brood of Evil. Accept Death to the Broodmother. Also turn in The Sanctum of the Prophets and accept Magma Monarch.
21. Fly to the matriarch’s feeding ground just southwest of Ascendant’s Circle.
22. Use the Young Twilight Drake Skull to summon Desperiona. Kill her to complete Death to the Broodmother. Aronus and Aviana come to help so don’t panic when she appears.
23. Fly to the charred area southwest of Sulferon Spire. Find King Moltron. Land near him and use the Drums of the Turtle God to summon Tortolla. Kill King Moltron to complete Magma Monarch.
Note: The next quest is, as of this writing, severely over-tuned, to the point that a 5-man group would have difficulty completing it even though it is not a group quest. I was able to get it done with a lot of help, but it should be adjusted by the time Cataclysm goes live. If not I will adjust the description of the quest to indicate that you need a group.
24. It’s finally time to fight Ragnaros. Fly to the flamegate just past where you fought Azralon. Enter the portal and speak to Cenarius to start the battle. Malfurion Stormrage and Arch Druid Hamuul some to help out as well.
Once the battle starts, Cenarius will hold threat on Ragnaros, while Hamuul and Malfurion cast spells on him that cause Ragnaros to take 2000% increased magic and physical damage.
Every 30 secods or so, Ragnaros will submerge and summon a flame wave. Once the flame wave passes, Ragnaros will summon adds that attack Malfurion and Hamuul. Alternate between keeping the adds clear and DPS’ing Ragnaros until he dies.
Once he is finished off, go back through the portal to be teleported back to the Throne of Flame.
25. Fly back to the Gates of Sothann and turn in Death to the Broodmother, Magma Monarch and The Firelord. Accept The Battle is Won, The War Goes On.
26. Take the flightpath to Rut’theran Village
27. Once you land, take the boat to Stormwind Harbor
This is the end of my leveling guide for Mt. Hyjal. At this point, you can now follow the breadcrumb quest you picked up to continue into Deepholm. Or you can go to the other 80-82 zone, Vashj’ir.
I hope this guide was helpful to you, and that you enjoyed reading it. Feel free to leave any feedback in the comments below.


 by Arixan
Step 44… It seems that youStep 44… It seems that you may have to do some sort of damage to Forgemaster Pyrendius to get credit for the kill. I had to kill him twice; I didn’t get credit when I only used the runes on him. I was going after him at same time as two others (one alliance, one horde) – best I could tell, as long as you get a single shot of damage you will gain credit for the quest. Similar to the prior quest: Cindermaul, the Portal Master – I think you just need to deal some damage for credit. Just as I was getting close, a horde warlock engaged him. I took a shot at him, saw he was greyed out for me, so disengaged. After he was dead, I noticed that I was able to click on the quest items. Not bad for only firing one shot. :)Cheers
Good QuestionVashj’ir seems like it’s an experience of a zone with new challenges, so it may require a degree of learning. I Have always leveled my characters through Howling Hjord and Borean Tundra in LK, as it’s nice to over power the mobs a bit. I would think there will be 2 scenarios for speed (if going for Realm First)1. People may well skip Vashj’ir simply because of the underwater dynamic2. People will dive straight into Vashj’ir first, so they can get it out of the way and ultimatelty push the other zones with their flying mounts in tow.
fastest progression?Hello and thanks so much for creating these wonderful guides! I have a
question about the fastest way to progress through the new zones in
terms
of experience maximizing. I do not have a beta key so can’t really test
this out myself unfortunately. Do yall think I would level faster going
through both the low level zones first (Hyjal and Vashj’ir) and then on
to Deepholm? Or would it make more sense to go straight to Deepholm
after, say, finishing Hyjal? Thank you!
Nice!Now that is an awesome guide!
Unfortunally i haven’t been lucky enough to get a beta key for cataclysm..
But i am 100% sure i am going to level by this for 85 😛
Keep work up, (for 82-85 :D)
Cheers
//Bladespire
[b][i][color=#FF00FF]Old enough to know what is wrong, young enough to do it anyway..[/color][/i][/b]
A little bit of an updateI went through the early part of the zone again to get the changes there, since it got quite the overhaul. Added a couple maps I was able to pound out along the way. More updates to come later.
It will be updated.I am planning another pass through closer to the end of beta to update everything, plus add maps and coordinates.
Thanks for the feedback though. I was a little surprised to see how much they had updated some of the areas in this zone.
Darkwhisper GorgeDarkwhisper Gorge
Step 4… might have been bugged when you went through. Using the blackjack killed the mob.
Step 18… If an Twilight Guard sees you take the Twilight Communique, he will attack. He’s an 81 elite; soloable, but he hurts, especially if you’re not prepared to be attacked.
All I got time for this weekend… Stopped at step 42.
The Scorched PlainThe Scorched Plain
Step 2… east, not west. Looks like that needs to change a lot in this chapter.
Steps 5 and 6 are duplicates.
Step 23… The quest is now named Commander Jarod Shadowsong.
Sanctuary of MalorneSantuary of Malorne
Step 3… the target are now Core Hounds. You need 4 Core Hound Entrails.
Step 5… the targets are now Lava Surgers. You still need 10.
Step 7… Nemesis no longer prompts a vehicle bar. When he eats the bait, he becomes clickable with a gear. Run up and “use” him, and then run away. If you do it fast enough you can mount up before he comes out of it and aggros on you.
Step 9-16… A Gap in Their Armor now becomes available immediately after picking up Sethria’s Brood. So you can kill dragonkin and pick up armor plate along with getting The Codex of Shadows, turn in all three, then go back out for Disassembly and Egg Hunt.
Step 29… Apparently the (person)’s Message to Ysera quests have been yanked out. Now Ysera appears in a vision at each point these would have been and expresses her gratitude at your work.
Step 43… No breadcrumb quest, but you still have to go all the way back to Ysera for The Last Living Lorekeeper. I think this may be bugged… Aviana tried to give me a followup that said I wasn’t qualified for it. Without the Message to Ysera quests, there’s going to be a lot of lost questers.
Grove of AessinaGrove of Aessina
19… The fawns can be killed while you’re leading them. If you fight something that AoE’s, your fawns will probably die. They do follow while you’re flying but seem vulnerable still if you go into combat. I’m not sure if they draw aggro by themselves.
Shrine of Goldrinn
StepShrine of Goldrinn
Step 4… Twilight Providers should be Twilight Proveditors.
Step 8… there is no longer a kill count on this quest, but now it’s 6 Polluted Incense.
Step 12… When you turn in Lycanthoth the Corruptor, Goldrinn will take you on his back for a ride around the shrine. He beats up a lot of Vandals and then drops you off when he’s done and back at his… altar, I suppose. Currently the ride-along part is very buggy, with your camera view half in the ground and you cannot change camera angles at all. Once he drops you off, he offers The Shrine Reclaimed.
Step 14… Brighitte Duran is now named Rio Duran (lol). Unfortunately, there is no sand for her to dance on 🙁
Step 25… Apparently you get a buff after turning in at the book… “Make Gar’gol Ogres Friendly”. “Your manipulation of the Eye of Twilight has convinced Gar’gol’s Ogres that you are friendly.” I don’t know how long it lasts, I didn’t see it till I was turning in at the camp and it had 3 minutes left, but I didn’t have to fight anything after step 25 at all. Might want to re-arrange 23-28 so that the player picks up this buff and then finishes the rest of the cave quickly.
Step 44… It seems that you may have to do some sort of damage to Forgemaster Pyrendius to get credit for the kill. I had to kill him twice; I didn’t get credit when I only used the runes on him.
Step 47… I did not get Goldrinn’s Message to Ysera. Abandoning quests is currently broken, but I’m going to make an assumption that this is not available since I already picked up Wings Over Mount Hyjal. Seems like a breadcrumb quest that they removed the need for.
Wings Over Mount Hyjal isWings Over Mount Hyjal is available at least when The Return of the Ancients is. It may not have been that way before. It seems wise now to perhaps pick up both and do both shrines one after the other instead of returning to Nordrassil in between.
That is, of course, assuming that it will also be available to toons coming straight from Northrend and perhaps not having reached lvl 80 first.
Archimonde’s Vengeance changesPlaytesting…
Archimonde’s Vengeance has been heavily redone. Beats me why. There’s not even a crater there now, at least not during that section.
Alysra is now a non-patrolling questgiver at some ruins not far from the barrow den, northeast of what used to be the crater area.
Suggested arrangement of steps: 1-7, 10, 8, 9, 11 (not returning to Malfurion), 12-16, Return to Malfurion, Return to Ysera. Turning in the Baron quest to Malfurion is out of the way no matter which way it’s arranged, but for the ground-bound it seems best to do that last before hitting the road back to Ysera.
Love it, looks great…Love it, looks great… can’t wait until I can actually play through it on live :)I really hope it keeps being updated as Beta goes on, because many things could probably change.
Yay, glad it was useful!Yay, glad it was useful!
That’s Perfect!!Just what I needed. Thanks for pointing it out 😀
For photoshopping… haveFor photoshopping… have you read my [url=https://www.wow-pro.com/wiki/creating_maps_and_graphics_gimp]Gimp Guide[/url]? Gimp is a free alternative to photoshop, and is pretty easy to use once you learn your way around it. The guide basically takes you step by step through how to make a simple map.
Let me know if you have any questions, I don’t use photoshop itself so unfortunately I can’t help ya there.
Yeah, still needs some work.Thanks!!
There are a few things I am not happy with still, mostly style things though. I’ll work on maps eventually, as I am horrible at photoshoping and I haven’t been able to do a map that looks decent enough to me. For right now though, I want to get at least the text of the walkthroughs done for all 5 zones by the time Cataclysm goes live.
With any luck, I’ll be able to make a second pass through all the Cata zone guides right before launch, making maps and getting coords for everything.
Once the Alliance guides are done, if nobody has picked it up yet, I’ll try to do the horde versions as well. For this zone, I believe everything is the same regardless of faction, except for the Shrine of Goldrinn.
Damn, that looks incredible.Damn, that looks incredible. Thank you very much!
I’ll test it as soon as I get beta access!
Arixan, you are full of win.Arixan, you are full of win. Obviously it still needs coords and maps, but this looks really nice. Thanks a ton for all the hard work!
All Done!Here you go guys, have at it!!
Gonna start on Vashj’ir next.