
 by wkjezz
The Pit of Saron is the second wing of the dungeon series located within the Icecrown Citadel stronghold. Before coming to the pit, you need to have completed The The Forge of Souls on either normal, or heroic mode. Upon completing this dungeon, players will be able to pit their wits against the finale of the series, The Halls of Reflection.
Because this dungeon is slightly more complex than the Forge of Souls, I will be breaking it down into sections relevant to the boss or event in which you encounter.
Table of Contents
General Quests
?The Pit of Saron (Alliance)
?The Pit of Saron (Horde)
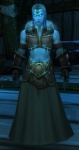
This quest will be turned in at the start of the instance following a little theatrical scene with you faction’s hero. Ask your group to allow you to do this, as most groups tend to want to dive head first into the instance. If the group are unwilling to facilitate this request, feel free to come back again with a group of your guild mates or friends later, but run the dungeon anyhow as it is good for Justice Points.
!The Path to the Citadel (Horde)
!The Path to the Citadel (Alliance)
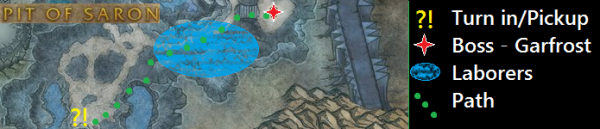
On your way to Garfrost, you will see Laborers/Slavers dotted around with picks chipping away at the walls. To free them right click on their ball and chain attatched to their ankles. Anyone in the group can free a slave, the whole group will get credit, providing they are on the quest.
There is also a quest available to those with the fortune to be on the Battered Hilt quest line, though I will not be talking about this quest in this guide as I believe it is better left for it’s own quest line guide for continuity purposes.
Mobs
On your journey to the first boss you will experience a number of enemies to combat, most of which are patrolling units. Depending on your tank determines how much of this trash you encounter, as timing your journey can largely dictate the amount of trash you fight. As mentioned, many mobs patrol, so it is a good practice to have your camera rolled out as far as you can in order to move should the situation warrant it.
Abilities:
Conversion Beam> Weakened Resolve
Shadow Bolt
These guys are usually accompanied by a gaggle of skeletons which will die though incidental aoe damage. The main aim is to burn through their 302,400 in a prompt fashion. Their debuff isn’t a nice one to precede a shadow bolt.
Deathwhisper Shadowcaster

Abilities:
Shadow Bolt
With a fairly insignificant 105,840hp, these guys are a simple kill should you encounter them.
Deathwhisper Torturer
Abilities:
Black Brand
Curse of Agony
Again, with a tame 105,840hp these guys are a quick kill. They can lay the foundations for people to take a nice amount of damage, so I do emphasize the Quick Kill. Unless you are farming the instance, you will most likely not encounter this mob.
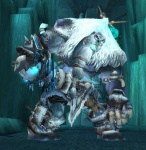
Iceborn Proto-Drake
Abilities:
Frost Breath
These mobs are the mount for Ymirjar Skycaller. Altough it might be tempting to attack the big dragon first, the ranged dps should prioritize slaying the rider first, especially if you have a less than average healer. At 252,000hp these dragons take a fair amount of dps to kill efficiently
Ymirjar Skycaller
Abilities:
Frostblade
Glacial Strike
With no ranged abilities, the ranged dps should focus on killing this guy before the drake it rides. Glacial strike can be problematic for a weaker or knowledgeable healer; especially if it is applied to a melee dps. At 252,000hp the partnership of the drake and it’s master means your group has to dish out just over half a million damage on these pulls.
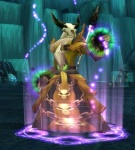
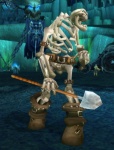
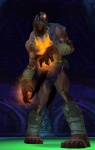
Wrathbone Laborer
Abilities:
Blinding Dirt
Puncture Wound
Shovelled!
I think the developers had a little fun with this mob, as he looks goofy and has some fun ability names. However; these mobs can be a pain, especially if they wind up in the middle of other pulls. Blinding Dirt is often cast upon the healer, so, simply burn these fellow’s 264,400hp promptly. Unless freeing the slavers, you will likely have minimal pulls with this type of mob.
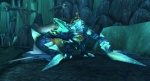
Forgemaster Garforst – 16 Justice Points
Abilities:
Chilling Wave
Deep Freeze
Forge Frostborn Mace
Forge Frozen Blade
Permafrost
Throw Saronite
Thundering Stomp
Achievement – Doesn’t go to Eleven
This guy is a big bad Mr Smite (Deadmines) style encounter, though oddly enough I would still fancy Mr Smite in a fight between him and Garfrost :/ Any how. This boss requires a bit of concentration on heroic, though should be simple enough. When you pull this guy, a bunch of skeletons will join the party, there is nothing wrong with popping a little aoe to kill them, as they can tend to gang up on the healer if the tank is bad at group aggro. Mr Smite will… I mean Garfrost will apply a stacking debuff (similar to Syndragosa) where as your damage by frost will be increased. To remove this debuff you will want to hide behind a saronite boulder which he will periodically throw as someone in your party. If he is lobbing this at you, you will want to move out of the way, as it can knock you back a fair distance, and cause LoS (line of sight) issues with your healer. You will see he is throwing saronite by a very large shadow, and also party boss mod addons will usually tell you to hoof it. Hiding behind the saronite, particularly when he transitions, will reset the debuff to it’s weakest state. Other than removing the debuff, or running from falling blobs of saronite, DPS this boss fast and efficiently, as this is a challenging fight for a less than average healer. Always follow the golden rule of tanking (unless dragons) and position the boss’ back to the dps and healers, as the cone damage ability can be completely avoided by your team that way.
Loot
Surgeon’s Needle
Barbed Ymirheim Choker
Legguards of the Frosty Depths
Malykriss Vambraces
Spurned Val’kyr Shoulderguards
Shoulderplates of Frozen Blood
Please enjoy the following video of the encounter:
 Back to the top
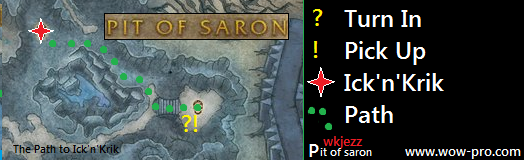
General Quests
?The Path to the Citadel (Horde)
?The Path to the Citadel (Alliance)
!Deliverance from the Pit (Horde)
!Deliverance from the Pit(Alliance)
Upon the demise of Garfrost, you will be able to turn in your quest and get the follow up from Gorkon Ironskull (H) / Martin Victus (A) who will make an appearance near the steps you climbed to reach the boss.
Mobs
There are only a couple of new types of mobs you will meet on your way to the next boss. These are as follows;
Geist Ambusher (also known as Pipecritters from ICC)
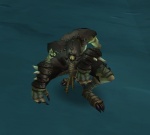
These little buggers will fly down off of the surrounding cliffs in typical jumpy glory that Geists tend to enjoy. The pack will be about 5-6 mobs worth with little over 100,000hp. Let the tank lead, as the name “Ambusher” tends to imply they like to Ambush.
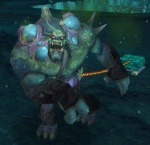
Plagueborn Horror
Abilities:
Blight Bomb
Pustulant Flesh
Toxic Waste
If you pull these mobs one at a time their 252,000hp should melt away fast, though some tanks like to /flex their ego and pull as many as they can. Either way, focus on one at a time, and try to stay behind them, unless tanking. They will occasionally spit some nice green acid at you that will leave a slick on the floor at your feet. “Voidzones don’t give buffs”, so go ahead and move out of this green pool of death. If your tank does pull many, I would still suggest your team picks one off at a time, as if you AOE a bunch, the slow damage may allow them all to cast Blight Bomb at around the same time, cuasing a lot of spike damage on your tank (which if (s)he does pull a bunch, in truth probably deserves, yes, my main is a healer, ) Do be aware that these mobs crawl all over the place where the next boss hangs out, so you will want to mind your position, and clear the area before the boss encounter.
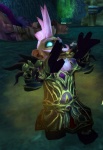
Ick and Krick – 16 Justice Points
Krick
Abilities:
Explosive Barrage
Shadow Bolt
Strangulating
Toxic Waste
Ick
Abilities:
Explosive Barrage
Mighty Kick
Poison Nova
Pursuit
This boss fight rewards those who are able to do their jobs whilst mobile. Players with sounds turned on will want to familiarize themselves with the following lines:
Quickly! Poison them all while they’re still close!
-About to cast Poison Nova, run away from the boss.
Enough moving around! Hold still while I blow them all up!
-About to cast Explosive Barrage; the key to this one is to move in straight lines, at walking speed. As you pull all players should position themselves no closer than 8 yards with one another
No, that one! That one! Get that one!
-shortly after Krick says this, he will randomly chase any member of your party. Ways to know this is you, is if you have a purple bobbing triangle above your head, or you see a very angry zombie bounding towards you. You are suggested to run away.
And that is the strategy in a nutshell. DPS, Tank and Heal similar to any other encounter, but remember to move when you need to.
One last thing to remember, “Much like the fires/voidzones, the poison does not buff you.” so be sure to move if you are stood on a bright green carpet.
Ick has about 903,227hp to burn through, and Krick is ultimately a place holder for the fight, that does not require or allow attacks against him.
Loot
Felglacier Bolter
Ancient Polar Bear Hide
Blackened Ghoul Skin Leggings
Braid of Salt and Fire
Chewed Leather Wristguards
Ick’s Rotting Thumb
The Gauntlet
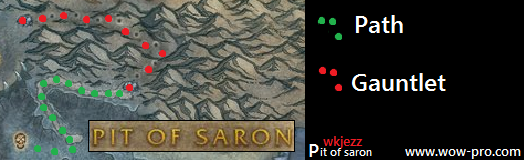
Achievement – Don’t look up
This is a relatively easy and fun gauntlet with a very easy achievement if you are a vigilant player/group. Before I get into the meat and potatoes of this part, someone is going to undoubtedly mention there is a skip here, if I do not. You are about to enter the mountainside which looks clear. Only as you walk up, four groups of very tough mobs will block your way in formation on an inverted L shape path. You can mount up as a group and miss the first two groups entirely if you wish, and dismount where the path changes direction.
Mobs
Wrathbone Coldwraith
Abilities:
Freezing Circle
Frostbolt
132,300hp of frost powered skeleton. These mobs are on the second stage of the gauntlet and straight forward to kill. Stay out of the freezing circles and it should be a cakewalk.
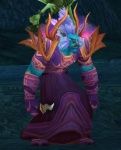
Ymirjar Wrathbringer
Abilities:
Blight
119,700hp and deadly. The healer needs to be on dispel double duty as the Blight spell ticks for 2-3000 damage per second. The Blight will jump if not cleansed. If you are not comfortable with your party’s cleansing options, maintain a good distance from other players. It has also said this effect can jump onto players once the rez, thus killing them over again, so cleansers, be ready.
Ymirjar Deathbringer
Abilities:
Empowered Shadow Bolt
Summon Undead
Probably one of the first mobs you want to take out if part of the pull. They can summon, as well as dish out a fair bit of damage. These ladies have 163,800hp
Ymirjar Flamebearer
Abilities:
Fireball
Hellfire
Tactical Blink
119700hp of firey undead Vrykul! They have a very potent AOE Hellfire which players will want to move out of as soon as they cast. They can use Tactical Blink, then cast this, so make sure you are ready for a blink hellfire.
Once you have cleared the path tot he cave you are ready to enter the gauntlet.
As far as gauntlets go, this one is very simple. Healers will want to try and avoid healing the tank while he or she traverses through the cave with group in tow. Be aware of blue rune circles on the ground, they indicate that part of the ceiling is about to give way, and all party members should avoid them, especially if gunning for the achievement. The tank will be gathering a bunch of Wrathbone Skeletons which are simple melee mobs with just under 38,000hp. In the middle of the gauntlet is a circular disk, which all players need to follow the tank to and stand on for the first spell of DPS. The “boss” of the gauntlet is a;
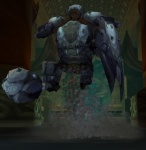
which is a melee mob, but also casts Avalanche. Just let the tank grab a second or two of aggro then unleash a storm of AOE to kill everything in combat. The mobs will keep coming, so as soon as your tank is ready, move on through the cave much in the same way as you did before. At the end you will repeat the AOE maneuver; but this time without the 252,000hp of the
Disturbed Glacial Revenant.
When you come to the end, heal and mana up, as the next fight will be a unique one for your 5 player dungeon boss.
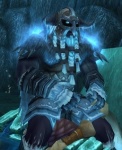
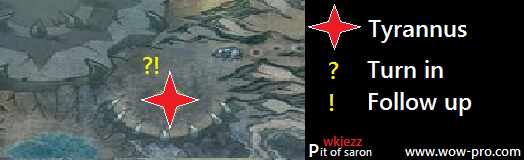
Scourgelord Tyrannus feat. Rimefang – 16 Justice Points
General Quests
?Deliverance from the Pit (Horde)
?Deliverance from the Pit(Alliance)
!Frostmourne (Horde)
!Frostmourne(Alliance)
These quest can be turned in, and the followup obtained upon the completion of the Tyrannus encounter.
The Showdown
Scourgelord Tyrannus is another wonderfully complex, yet esy to master boss fight, especially if you are super geared This fight requires control, and will ultimately humble a tank should he/she have a huge ego. First off, lets take a look at what the boss and his faithful sidekick can do.
Scourgelord Tyrannus
Forceful Smash
Mark of Rimefang
Overlord’s Brand
Unholy Power
Rimefang

Hoarfrost
Killing Ice
This boss has an impressive 1,078,480hp but with controlled DPS should become very simple to kill.
Once in a while he will mark a target for Rimefang to attack. This mark stays where the target was standing when it was cast, so the player should reposition a few yards away from it. Rimefang will Hoarfroast the area, creating a frost trap style area of ground, and stunning the person in this area for 5 seconds if the do not move.
Overlord’s Brand will cause any damage the target deals to the boss to amplify onto the tank, or if on a healer, heal the boss. If you are DPS and you have a red tehter to tbe boss, stop DPS, if you are a healer and share a green tether to the boss, minimize your healing. to also deal damage to the tank. This is a great example of when gearscore goes bad! If you have full 25person heroic ICC gear, and you ignore your brand, your tank will likely explode.
Tanks will want to note that the boss’ enrage is significant as it causes the boss to become untankable for a short period of time. The boss will be dealing a truck load of damage at this point will move with increased speed increased. Before he does this, he will knock the tank back and pause, before advancing after the tank. To survive this enrage the tank will want to put a hoarfrost patch donated by Rimefang in between the themselves and the boss. This will slow the boss makes him kiteable.
If you are unfamiliar to tanking this fight, here is a Wow-pro pro tip. In regular combat, if you put your back to a patch of hoarfrost on the ground his knockback will propel you past frost making it so he has to walk over the patch, thus expending his enrage.
And that’s the fight in a nutshell.
Please note in the following video, the team DPS the boss during the theatrics, this no longer serves a logistic purpose.
Loot
Engraved Gargoyle Femur
Rimefang’s Claw
Tyrannical Beheader
Nevermelting Ice Crystal
Rusty Frozen Fingerguards
Icebound Bronze Cuirass
Mudslide Boots
Prelate’s Snowshoes
Band of Stained Souls
Belt of Rotted Fingernails
Fleshwerk Leggings
Frost Wyrm Ribcage
Should you die…
Should at any point you need to runback to the dungeon, I found this short video explaining how to resume your dungeon in a timely manner
In closing I would like to thank Eric, whose instance guides provided me with the the template I adapted into this guide.
/cheer for awesome/cheer for awesome feedback!
/cheer for awesome guide!
You people make me happy 😀
Currently am working on theCurrently am working on the HOR guide, but you will be pleased to hear I have adopted the mob list in order of kill priority tactic.
I candidly mentioned the shortcuts, as I have only used the gauntlet shortcut once, and it was fouled up really badly, and I am one to really enjoy just melting as many mobs as I can. So now I have read your insight I am sure I will make some minor revisions. (The graphics, formatting, and linking of the POS guide took about 5 hours (dinosaur laptop) so I was expecting having to do some finessing later on.
As for the first list of 5 mobs, I did mention in the subtext “should you encounter them” “you will unlikely encounter this mob”.
As for aplhabetical listing, the gauntlet is messy, and I will clean that up here in a little while either after some sleep of after the HoR guide. However, with the subtraction of the “optional mobs” I thought it was the order of appearance, Necrolyte > Dragon+Rider > Labourers (pats can make this a little close I suppose) even if taking the shortcuts.
Oh wells, I think that a little bit of fine tuning and I should have this guide licked.
Thanks as Always.
Great guide as usual.
1) IGreat guide as usual.
1) I think that rather than listing mobs in alphabetical order for each portion, it’s better to simply list them in the order you’re going to be encountering them. I actually found it a little confusing as I know what order the mobs show up in, and it might be jarring for someone using the guide for first time too.
2) There are a couple of ‘shortcuts’ that can be taken in this instance, besides the one you glossed over. Unless you’re actively trying to farm for the Battered Hilt drop (haha), why not point ’em out?
a) You never should have to even fight the Shadowcasters/Torturers, and no more than one Necrolyte with his pack of skellies. If you stick to the right side as you come in, you can jump onto the slope and just face one patrolling pack with a Necrolyte. After that, two Laborers, then one protodrake/rider (the first can be skipped due to its patrol route, the second is necessary due to where it patrols). Then you’re at the boss.
b) The geists ambushers can be controlled a bit location-wise and a few skipped if you let the escaped npcs (I believe they only pop up if you’d freed some along the way) go ahead of you, as they’ll trigger the ambush and then stay on the ground, so that the tank can grab them all at once, instead of the entire party getting hit at once.
c) For the gauntlet, it’s possible to skip the first three packs (and again, I think you really should list them in the order encountered). You sort of went into skipping the first two…but you didn’t really explain the trick for it.
The first two packs are ‘activated’ when any member of the party moves away from the Krick fight area and near the slope. But they take a little while to set-up, and while that’s happening, one can skip the mobs if you’re fast.
What you do is have everyone in the party mount up and [b][u]AS A GROUP[/u][/b] all ride up the slope. You’ll see the Deathbringers appear near the top of the slope, and start to run down and summon the flamebearers. If you pass them all fast enough, you’ll never even aggro them. It’s [u]essential[/u] for everyone in the party to go at/near the same time, though.
The third pack before the gauntlet can -also- be skipped. If you hug the left wall, there’s a little hill that you can go up and use to skip that pack.
d) It’s worth noting that the last boss can and does bug out fairly easily, and not in the good way. If any party members are near the tunnel, the adds that spawn may aggro onto those members instead of the npc helpers. Make sure nobody stands near the tunnel. The boss himself can vanish (or worse, jump back onto Rimefang) after jumping down from the dragon. This bug is usually triggered by premature attacks done before he has started moving. So wait a short bit before attacking/casting!