
 by Jame
Guide to Lower Blackrock Spire
Introduction:
Blackrock spire is one of the most important high level instances out there, in terms of items, and also because it is a step you have to go through if you want to access the Upper Blackrock spire, and later on get a key to Onyxia’s Lair. I made no map for this zone, because it is simply a mess, with tons of floors, layers over layers, a map just simply would be too unclear and wouldn’t help me in the guide at all. I will instead describe the path to take in this instance step by step.
Quests:
Note: Quests written in Orange are those you must have before entering BRS the first time. Other quests are either follow-ups or starting inside BRS.
Both:
- [58]The Final Tablets (Elite), given by Prospector Ironboot in Tanaris (Steamwheedle Port). This quest is the follow up of a long serie of quests. The first one is [47] The Prophecy of Mosh’aru (Elite), given by Yeh’Kinya in Tanaris (Steamwheedle Port as well), and requires the 1st and 2nd Tablet of Mosharu (found in Zul’Farrak). The follow ups are [50] The Ancient Egg (Elite) (found on top of Jintha’Alor in the Hinterlands), then you will get [53]The God Hakkar, this takes you to Sunken Temple (lvl 51+ Instance) where you have to complete the script with the god Hakkar, and fill up the Egg with Hakkar’s essence. The follow up for that quest is [58] The Lost Tablets of Mosh’aru (Elite), given by Prospector Ironboot. Those tablets are located in the Eastern Plaguelands over the Temple at the Mossflayer troll camp. Then you will finally get the quest for the last two tablets, which happens in lower Blackrock Spires. It will be described later in the guide where those tablets exactly are.
- [59]En-Ay-Es-Tee-Why (Elite), given by Kibler at Flame Crest (Burning Steppes). Basically you have to collect eggs. Be aware though, that opening those eggs can sometimes spawn every annoying spiders. So do that quest only if your group really wants to get a cute spider pet and feels like killing extra spiders :roll:, the spider area will be described later in the walkthrough.
- [59]Kibler’s Exotic Pets (Elite), also given by Kibler. The worg pups can be found in the same room as the boss worg, Halycon. It will be described in the walkthrough.
- [60]Mother’s Milk (Elite), given by Ragged John at Flame Crest (Burning Steppes). At the spider area you will find a named spider, the Mother Smolderweb, she casts some AE Poison on your party. If you want to finish the quest, do not cure the poison, Hearth out to Kargath (Horde) or Lakeshire (Alliance), and go to Flame Crest. This is not so much trouble actually, because you can then zone back into BRS and take a shortcut straight to the Spider Area, I will describe this later in the walkthrough.
- [60] Seal of Ascension (Elite), given by Vaelan (Inside Blackrock Spire, will describe in details where he is in the walkthrough). This quest is the key quest to Upper part of Blackrock Spire, it requires you to find an Unadorned Seal of Ascension, which is a ~0.50% Chance drop from any humanoid (Ogre, Orc, Troll) in Blackrock Spire. You also need 3 Gems for this quest, the Gem of Spirestone (dropped by Highlord Omokk), the Gem of Smolderthorn (dropped by Warmaster Voone), and the Gem of Bloodaxe (dropped by Overlord Wyrmthalak). Those gems are about ~15% drop rate. Once you have the 3 Gems and the Unadorned Seal of Ascension you will have to go speak to Vaelan follow his directions.
- [60]Urok Doomhowl (Elite), given by Warosh (Roaming NPC inside BRS, you can’t miss it). The quest objective is to First find a Pike (will describe that later), to kill Highlord Omokk, and loot his head. Then go to a certain place and put the head on the pike, and plant the pike on a pile of skulls, which will trigger a script, a very hard script. At the end of that script, after killing tons of Ogres, you will face Urok Doomhowl, kill him, and get Warosh’s Mojo. This will be described in details later in the walkthrough.
Horde:
- [61] Warlord’s Command (Elite), main and most important quest (it is the first thing you need to do if you want to start your Onyxia Key quest as well). Given by Warlord Goretooth in Kargath. You must talk to him and go through his dialog, he will then give you a letter. This letter starts the quest. It is said that you need to have at least Friendly faction with Orgrimmar, or Warlord Goretooth won’t give you the quest.
- [59]Operative Bijou (Elite) , given by Lexlort in Kargath. It will be described later where exactly Bijou is located.
- [59] The Pack Mistress (Elite), given by Galamav the Marksman in Kargath (on top of the tower).
Alliance:
- [59]Bijou’s Belongings (Elite), the quest is given by Bijou herself inside the instance. It will be described later where she is exactly. This quest is important because it’s part of the main quest line in BRS.
- [59] Put Her Down (Elite), given by Helendis Riverhorn, at the Alliance outpost in Burning Steppes.
Walkthrough:
Group composition:
- Tank: Warrior or Prot spec Paladin
- Healer: Priest or Druid
- Recommended: Mage. (if not, warlock with succubus, or druid in case you also have a priest as main healer)
- DPS / Support
- DPS / Support
Level requirement: level 58+ at the very least, being lvl 60 is recommended.
Keep in mind these are just general guidelines, I have done Blackrock Spire with the weirdest group compositions. But ultimately, you need a solid group, and a certain mix of classes and abilities, or you won’t get far. Mage helps greatly, especially when you will be dealing with spiders. If you don’t have a mage, a druid will be a decent replacement (they can Sleep the spiders)
1. To the first fork:
Note: I’m going to describe the shortest way through the instance, this means we will be skipping as much mobs as possible, and use all the shortcuts. If you prefer not skipping content, feel free to kill everything in your way, and just follow my general directions.
After entering the first room, pull the 2 Orcs on the left. There is also a 3rd Orc roaming from the left to the right, kill it. Then move your group, hug the left wall, go up the stairs, and wait on this ‘bridge’ for a patrol. Kill the patrol. On the left is the Door to Upper Blackrock spire, on the right is a drop off. Go to the drop off and jump down. Wait for another patrol there, be careful to not aggro it until it is far enough from the other mobs in this room. Pull and kill it.
You are now facing your first ‘big’ pull. 4 Orcs + 2 Pets (non-elite).
If one of the Orcs is a warlock, follow these rules:
1. If you got a mage or a warlock using succubus, sheep / seduce the Warlock, and kill it last.
2. If you do not have the above classes, kill the Warlock FIRST. (Yes, even if you have a rogue, Sap just doesn’t last long enough and the warlock will most likely awake before you are done with the rest).
But why? Because the Scarshield Warlocks have a special ability, they open a portal, and demons come through it, Imps, felhound, etc. You end up being overwhelmed and soon enough the whole burning legion is zerging your group, if you let them alive too long. So when you kill them, use stuns and interrupts as much as you can.
Once you are done with your first big pull, go down and left, until you reach your 2nd big pull. 4 Orcs. Follow the same rules as above.
Note: This room has a ”shortcut” access, let’s name it the ”Shortcut to Orc alley”. If you go to the right and jump down, and then walk further along the ledge, you will then be able to jump down to an area full of orcs, close to the Spider area, but this isn’t any use to you right now as you first need to clear the place down there.
Pull the Scarshield Raider and his two pets on the left, the group of mobs on the right should not aggro. Then hug the left wall and move down until you face another group of 4 mobs down the slope. You can skip those mobs, just go left as much as you can and climb up the slopes.
Note: If you go totally up and left on those slopes, you can reach the platform where the Scarshield Infiltrator stands alone, do not fear, this mob is actually a friendly NPC in disguise, Vaelan, he will turn into a human form when you get close. Vaelan is the NPC who gives you the quest for the UPPER blackrock spire key. But this doesn’t interest you until you get your Unadorned Seal of ascension and the Gems. (see in the quest section above).
Anyway, just go around that bunch of mobs until you get to the next bunch. It should be 4 Orcs + 2 Pets again. Deal with them and go further left until you reach a wooden bridge. This is where the pulls get tricky because you have to fight in a very small perimeter, have to deal with a warlock, and also other casters that you must somehow pull to your group, (use counterspell, shieldbash, etc) or they will run when low on health and aggro more.
After clearing those, pull the Scarshield Raider and his 2 pets, he should come solo. Then, provided everybody in your group is lvl 60, you can skip the mobs on the left. Just hug right and get on the next wooden bridge. If not, kill them.
Clear the mobs after the 2nd bridge, and move up. Along the left wall you should see clickable ‘Roughshod Pikes’, pull the sleeping orcs next to them. (they sleep but they aggro if you get close) And then loot the pike. It is needed for the quest Urok Doomhowl later on. By now, you should already have met Warosh, that ugly Trogg looking npc roaming around, and you should have the quest from him.
Pull to the right, then move up around a large crack in the floor, you will then be facing an Arch guarded by 3 Ogres. This is the first fork, you have two choices, go straight, to the Ogre area, or go right and down the slope, to the Troll area. We are going to the ogre area first!
2. The Ogre Area:
Pull forward, do not fight on bridges, the Ogre reavers tend to toss people in the air, so be careful about this. After you pass the bridge, you will enter a big room. On the left is a small rock ‘hill’, with ogers on it. Ignore those, and go right, clear a few more ogres until you reach the first Boss – Highlord Omokk, and his 2 guards.
How to: Highlord Omokk is possibly the easiest boss fight in Lower BRS. Sheep, Sap, Succubus seduce one of the guards, or both if you can. If you can only Mez (mez is anything that puts a mob to an inactive status) one, have your warrior tank the boss while the rest of the group focuses on killing the other ogre.
Highlord omokk has one annoying ability, he tosses the tank in the air, and this tends to erase the aggro list. So, warriors, have taunt / mocking blow ready.
Note: When he dies, have everyone in the group check the corpse. He can drop a Gem of Spirestone (of the UpperBRS key), and if he does, only ONE person can see it on the corpse at first check. After that person sees the gem and gets off the corpse, everyone should be able to see it. This is because this Gem is awarded as ‘Group Loot’ to only one person. So if you don’t want to miss on those Gems (which are a ~15% chance drop), make sure everybody checks the corpse!
Also, loot the head. You will need it later to combine it with the Roughshod pike (Urok Doomhowl quest)
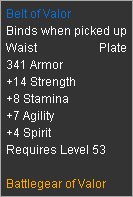
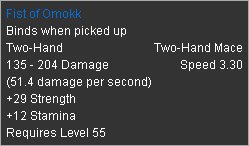
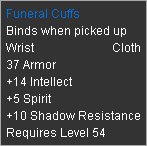
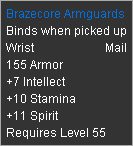
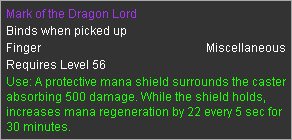
Highlord Omokk’s loot list consists of 6 blue items, some of them, such as the warrior set belt, are really good:
Horde: check the floor next to where you fought Omokk, there might be ‘Important Documents’ for the main quest.
Go back to the fork, and this time go toward the Troll area.
3. The Troll Area:
Go down the slope, clear the few trolls there. Then start pulling the next room back to the slope. I really recommend pulling a good part of it before you move in, as those trolls really like to run away in fear and bring friends.
Some of those trolls cast Hex Frog, so have dispel ready.
Once you feel you have pulled enough of the next room, move in. Straight ahead in the middle of opposite wall, is a door with a stair leading you to the room where an optional boss is: Shadow Hunter Vosh’gajin .
I recommend pulling the whole room (besides the Boss and his 2 guards) way back to the previous big room. They like to run and get the boss to add.
How to:
Mez the 2 adds if you can. If you can’t kill the loose ones first while your warrior is tanking the boss.
The difficulty of this fight is that the boss casts AE Frog Hex. So be sure your warrior is tanking the boss far away from the rest, and have dispell ready.
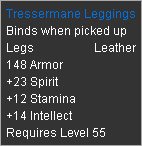
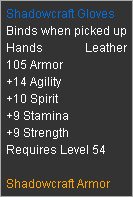
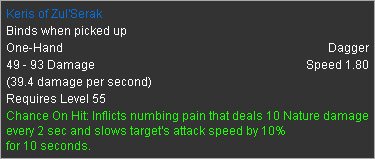
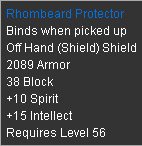
Shadow Hunter Vosh’Gajin loot list contains 1 common green item and 6 blue items, namely the Rogue set gloves:
So don’t wonder anylonger why your rogue/hunter friend pesters you to go and kill that annoying named 🙄
Note: In the back of the room is one of the two missing Tablets from the quest [58]The Final Tablets (Elite).
Go back to the big room and start clearing down the Slope to the middle platform.
4. To Bijou
Warning: Beware of the patrols here.
When you reach the platform in the middle of the 3 slopes, go to the opposite side, up the slope, clear a few more trolls, and on the left will be the NPC Bijou.
Get the follow up quest from her, Bijou’s Belongings. Once you have the follow up quest, go back down to the middle platform, and take the slope leading down, then pull to the right. Clear yourself a way to the door infront of you down the last slope. 2 more pulls and you should be facing the 2nd Boss:
5. Warmaster Voone:
Nothing special to say about the encounter, he hits like a truck, especially by the end of the fight. When he dies, don’t forget to check the floor for Important documents (Horde), also check for a Bijou’s belongings, which look like a brown suitcase. If it’s not there, it will be further, in the Orc alley. Also, Warmaster Voone has a ~15% chance to drop the second Gem you need for the Upper BRS key, the Gem of Smolderthorn. Make sure everyone checks the corpse.
In his room you can also find the last tablet you miss, and complete the quest The Final Tablets.
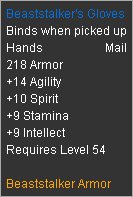
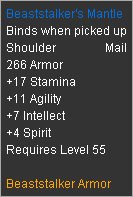
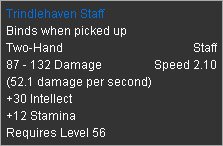
The loot table of Warmaster Voone consists of 5 Blue items and 2 Green items, one of them is the Ranger set Gloves:
Alliance: As soon as you get Bijou’s Belongings. I recommend you go back to Bijou immediatly and get the followup quest, which will have you take a message to Marshall Maxwell at the outpost in Burning Steppes. Maxwell will give you the main quest for BRS, [61] Maxwell’s Mission (Elite),so it’s even worth it to warp and run back. But you can wait to fight the Mother Smolderweb before doing that, because you will need to warp back to the outpost if you want to complete the quest Mother’s Milk as well.
Now is the time to take your first big shortcut! Go back up all the way to the start of troll area, past the big room full of trolls, until you are back at the first ramp, where you encountered the first trolls. The exact spot where you must jump down is located right next to the door connected to the big room. Be very carefull before you jump, you must aim so you fall as close as possible to the corner right under you. If you jump too far or too much to the right, you will immediatly aggro mobs. If you do though, keep your cool, deal with them, and be very careful to not let them run and aggro more.
6. The Orc alley:
After jumping down, ignore the Orcs on your right behind the rock. Start pulling from straight ahead of you.
Pulls are very tricky here, so do it with caution, as you get very quickly 2 camps at the same time and will probably wipe from that.
Firebrand Grunts are the melee type and use Mortal Strike, beware. 🙄
Other than them it’s mostly casters, but luckily no more warlocks.
Bijou’s belongings can be found somewhere on the sides, all along the Orc alley. So keep your eyes open for it. Keep pulling and working your way through those orcs, until your reach the Spider area, this is when things get tougher.
Note: The orc alley is where you land if you take the 1st shortcut I described at the beginning of the walkthrough, after the 2nd big pull (4 Orcs) of the instance.
7. The Spiders:
This is the place everyone dreads, where many groups stop and give up. Though, trust me, those spiders aren’t that hard with a bit of organization.
The deal: The first pull of spiders will consist of 2 Elite Spire spiders (don’t even try to split them) + a bunch of mini spiders, those spiders actually are halfway between Elite/Normal, Hitpoint wise. They also hit really fast, which is bad when they start beating on casters.
The big spiders cast a stun, a long stun. (about 8 second long) And this stun can hit several targets at a time, so if you can, don’t be too close to it.
Last thing I should mention, is that when you kill one of the big spider, a bunch of other little spiders spawn.
So if you can count, that is a lot of Spiders 😉
The drill:
- Make sure everyone is full mana before pulling.
- Assign targets before pulling. Decide which of the two spiders the mage/druid will be sheeping/mezzing. If you haven’t got either, assign who will be offtanking the 2nd spider. No matter who it is, this person must keep the 2nd spider away from the rest of the fight.
- The warrior will be tanking the 1st spider and as much of the little spiders as he can. (Spam some demorilizing shout and have Thorns or Imp Fire shield up helps a lot).
- Kill the little spiders first in the fashion you prefer, AE them or /assist kill them one by one.
- Kill the 1st Big Spider. When she dies, more little spiders will appear, kill them, just like you killed the other ones before.
- Depending on the general mana situation of your healer, keep sheeping/sleeping the 2nd big spider until enough mana is regenerated.
- Go for the 2nd spider, from now on it should be easy. The main difficulty is to control the pull and the first spiders.
Note: Try to pull those spiders way down the ramp, on flat ground, to avoid evade bugs. Also note that the stun can be dispelled.
If you manage to be victorious, this means your group can probably go until the end of the instance. Congratulations. But don’t cheer too fast though, there are much more spiders to kill. (I hear you cry)
Loot the immature venom sacs and put them on a hotkey, you can right click them to remove the poison from the Mother Smolderweb.
8. Mother Smolderweb:
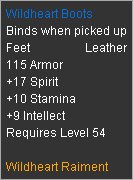
After the first pull of 2 spiders. You should be able to pull the Spider named, Mother Smolderweb, she isn’t that hard. Just like any other spider, with more hit points and hits a bit harder. Also splits into more little spiders when she dies. She can drop the Druid set Boots:
She also casts the poison you need to keep on yourself if you want to finish the quest [60]Mother’s Milk (Elite). If you do, after the spider dies, warp back to Kargath/Lakeshear and go to flamecrest as fast as you can. It’s kinda annoying because the venom of the spider is actually casting net on you and immobilizing you every now and then 🙄
Then just run back to BRS, and take the 1st shortcut, jump down on the right after entering the room where you fought your 2nd big pull. (which consisted of 4 Orcs). This will take you back to Orc Alley, really close to Spiders. Go back up the ramp, and pull the solo roaming spider. You can then skip the two spiders in the ‘pit’ on the left. Just run as close as you can on the right, at the edge of those ramps. Stop at the point where they cross, and pull the next 2 spiders there. Deal with them exactly as I described the first pull.
Keep going forward, there is 2 more double spider pull to do!
Note: The 3rd double spider pull might have a rare spawn named spider in it, which is in a way a luck, but in another way bad, because this named, The Crystal Spider, upon death, spawns double the amount of mini spiders 😛 Have fun dealing with them! And beware of the evade bugs.
If you go through all the spider pulls sucessfully, you will reach a platform, with ogres all over it. Oh, and if you feel up to kill a few extra spiders (who knows!), you can click the eggs and try to finish [59]En-Ay-Es-Tee-Why. Open one egg at a time, as it can spawn spiders.
9. Urok Doomhowl’s pad:
Once you have that pad full of ogres clear, you will find a pile of skulls in a corner. If you plant the Roughshod Pike + The head of Highlord Omokk on it, a script will start.
Don’t do that now though, there is a very high chance you will wipe on this script. It is the hardest battle in the whole dungeon and it is optional. You can come back after you have killed the other ‘easy’ bosses and do this script as last thing you do before leaving the instance. I will describe in the last paragraph how to deal with this hell of a script 🙂
10. To Halycon:
From the Ogre pad, move on and pull a bunch of scorpids, AE them. They are easy. Another pull of those and then you should probably meet your first patrol, deal with it.
Go up the stairs and wait for another patrol coming down from the other stairs. Turn right and pull the 3 orcs standing there against the wall. Left of those 3 orcs is the entrance to Halycon’s Nest. So don’t get too close until you are ready.
Warning: One thing you should know before pulling Halycon, there a lot of Worg pups in her room. Those are the ones you must capture to finish [59]Kibler’s Exotic Pets (Elite). Just target one of the pups and right click the cage from your inventory. If pulled carefully, you can probably get the bunch of pups without agroing Halycon herself.
In any case, pull Halycon and defeat her, she is quite easy. The only hard thing in the fight is that when she dies, her mate comes to avenge her. Gizrul the Slavener is a bit tougher than Halycon. But it shouldn’t be much of a problem.
Gizrul can drop several blue items, namely the Druid set Spaulders:
Also worth mentioning, by killing Halycon you just completed another quest: The Pack Mistress (Horde) // Put her down (Alliance).
When coming out of Halycon’s nest, you have two options. Go right and up the wide stairs, and clear up to an Optional NPC: Quartermaster Zigris. He is a rare spawn but is often there. So if you want extra loot, go for it. Else, start pulling from the other door, from up the stairs.
Pull a good chunk of the next room (a large room with cracks in the floor and wooden planks to cross them) before going up. Runners are the main killer here.
Also, beware of the Evokers, they deal massive damage plus AE Knockback and stun. Mez them or kill them first.
Keep pulling a path through this big room, until you can reach the opposite side and go through the door that leads you to the last area, and the last boss.
11. Overlord Wyrmthalak:
Keep going right and up until you face Overloard Wyrmthalak.
Infos:
-Wyrmthalak hits fairly hard, has quite a lof of HPs, and has one annoying ability, he tosses people up in the air. Which has the secondary effect of wiping the aggro list. Have taunt ready..
-At some point in the fight, he will call for help. And 2 adds will come running to his aid, they will come from behind.
Deal with them, sheep or succubs mez them if you can. If not, kill them while your warrior offtanks wyrmthalak.
When wyrmthalak dies, don’t forget to make everyone check the corpse for a possible Gem, and also check the floor for possible Important documents (Horde).
There, now you know how to kill the 3 main bosses of Lower Blackrock Spire. That means you can farm them at will (they drop nice items), and also work on getting all 3 Gems for a key to Upper Blackrock Spire. Also, you will need to come back if you want co complete your main quest. (If you are horde and still miss the important documents as well).
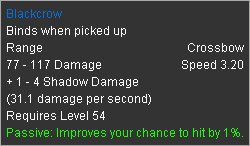
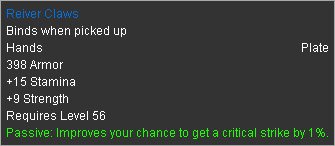
Overlord Wyrmthalak’s loot list consists of 6 Blue items (including the Ranger set Spaulders), and if you are lucky, a purple item:
But there is one last thing you must face before going out of the instance, you have to save that stupid Trogg, warosh, and get his mojo back!
In short, you have to defeat a very hard script, and Urok Doomhowl.
12. Face Urok Doomhowl:
Go back to the Pad with the pile of skulls. You can take a shortcut, jump down in the first crack you stumble on in the big room with the planks / cracks. Move your group to the pad and brief them.
What happens when one places Omokk’s head on the pike, on the pile of bones:
- A bunch of Ogres starts to spawn. Per waves of 3 max. They are Elite, they hit hard, and they spawn fast. No 5-man group could normally withstand so many elite mobs, but there is a trick to this encounter.
- The pike you just planted in the skulls has a magical ability, it can nuke one ogre dead every 30 seconds. So you must have someone on duty, next to the pike, ready to click it everytime it’s possible.
- Organize your group well. Sheep or Succubus mez them, assist one person, take them down as fast as you can. Try to bring a Full HP ogre next to the pike every 30 seconds and nuke it dead.
- Also, the Urok Enforcers really hurt. They are easy to reconize, they use 2 Hand spiked maces, and hit really hard 😛 Try to get those nuked down and killed fast, because they are the main threat.
If you stay alive long enough through those waves of Ogres, Urok Doomhowl will appear. He will most likely appear as you already are overwhelmed by Ogres. But do not panic, he can be either: Sheeped, Succubus seduced, or even kited. He walks very slow.
Anyway, don’t fight him, mez him or kite him. And deal with the remaining other ogres. The nuke-pike disapears when Urok spawns too, to spice things up a little more.
Once there is only Urok left alive, fight him. He isn’t that hard when he is alone. He hits reasonably hard and fears, nothing too bad 🙄 .
Upon killing him, Warosh will appear next to you, loot the Mojo from Urok, and complete the quest!
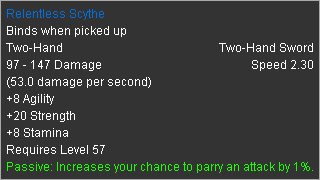
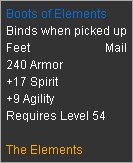
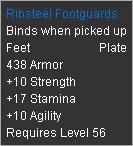
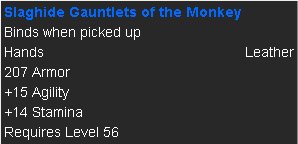
Urok Doomhowl’s loot table consists of 3 Blue items, the Shaman set boots (which could use an upgrade), great plate boots, and good leather gautlets with random stats:
That’s all there is to know about the Lower Blackrock Spire instance, and soon I will release a guide about the Upper Part, which is designed for small raids.
I hope you enjoyed this walkthrough, and that it wasn’t too confusing without a map. But once you have done a few runs in BRS, you will understand why a map wouldn’t have helped much.
If you see anything lacking or inaccurate in this guide, please post here or inform me by private message. I will do my best to keep it up to date.
Thanks!
-Jame
Copyrights WoW-Pro All rights reserved
Needs an updateWe are recently working on improving the quality of content here on WoW-Pro.com, both by limiting low ranked guides and by moving out of date guides into archives. For more information, see [url=https://www.wow-pro.com/node/3016]the full news post detailing this process[/url].
This guide needs an update to make sure it is current with patch 4.0. However it still has enough useful information that it will be left in it’s proper section as-is.
If someone else would like to adopt the guide, or if you have any questions about this process, feel free to comment here.